Mitered Placemats

P5310407.JPG

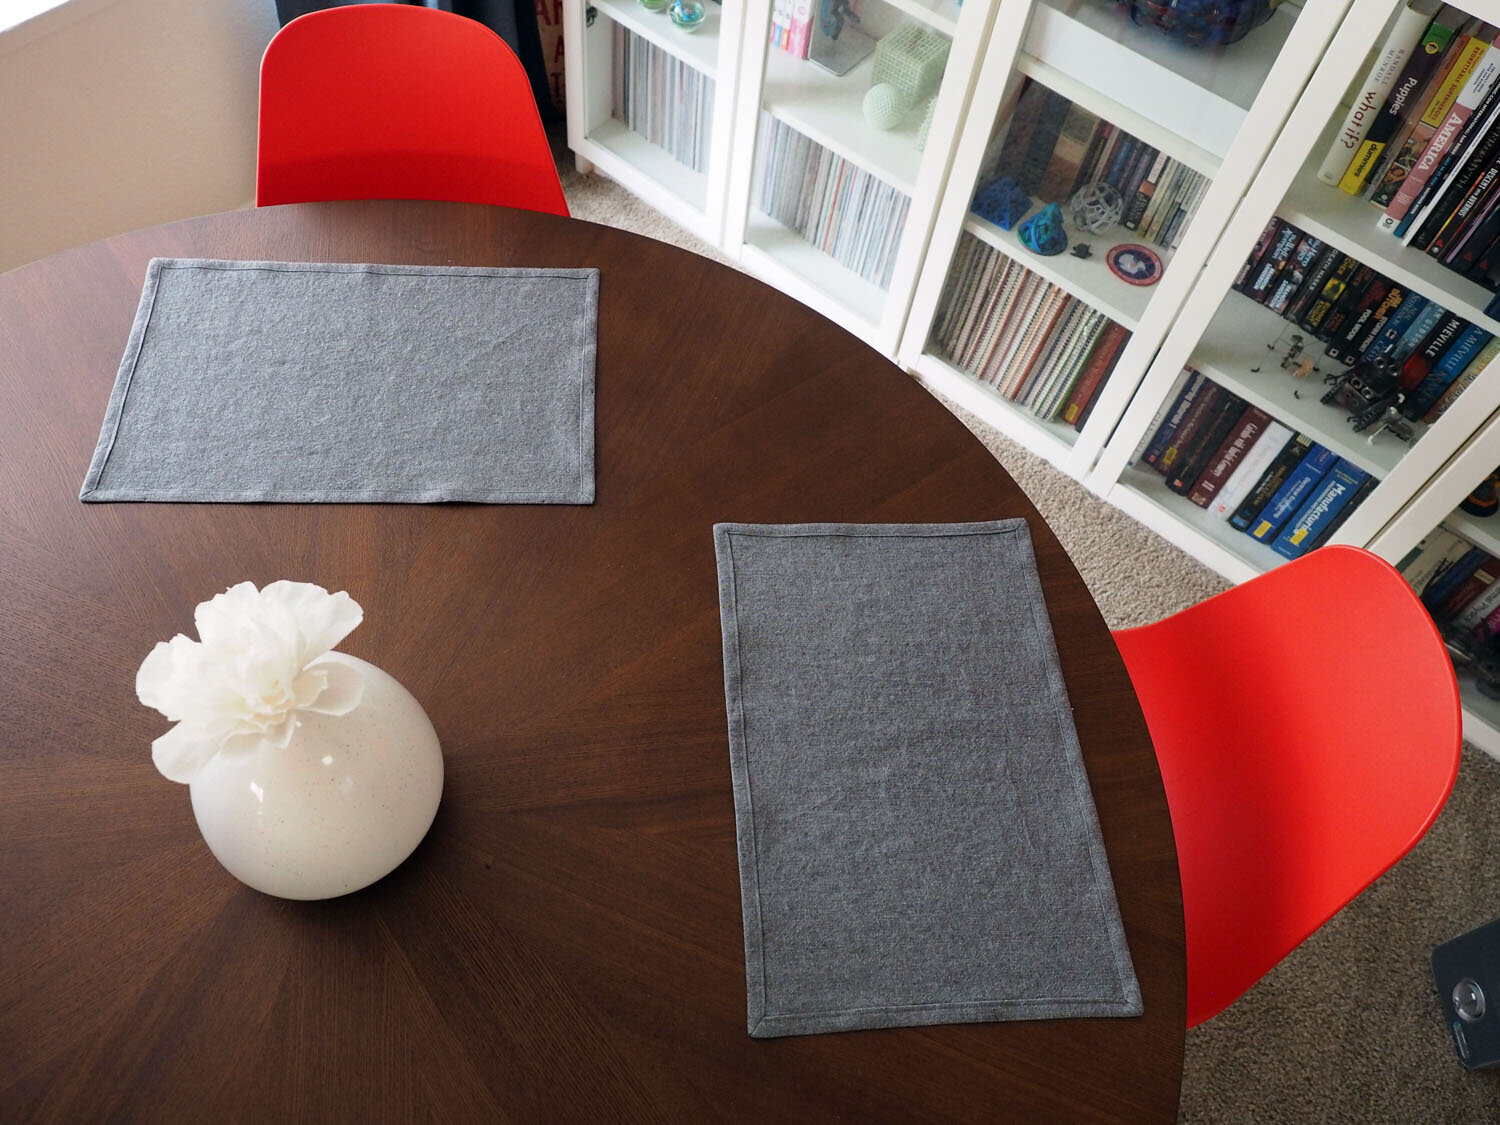
My partner likes to joke that they’ve been “coaster trained” since we’ve lived together, and while I appreciate their shared consideration for our furniture, I wanted to make a set of placemats for our new wooden dining table so that we could enjoy it without worrying about hot dishes or condensation.

Pattern: Used the technique from Purl Soho’s Classic Mitered Corner Napkins pattern. NB: you’ll want to cut fabric 2 inches larger than your desired finished dimensions because the mitered edges will take up 1” seam allowance on all sides. Made in Kaufman Yarn-dyed Essex in Shale.

New skills: n/a

Lessons: Using a hot hemmer to make the hems was an upgrade from using a seam gauge.

There’s no standard for placemat sizes or aspect ratios. I went with a 11.5” x 17.5” finished size, which I mocked up using a piece of paper and my cutting mat. Because I have a round dining table, the specific consideration I had was getting the mat to sit close enough to the edge of the table.

Midway through the project I switched to using a bi-level edge stitch foot, and offset the needle position by 2mm. By placing the center of the guide against the hem I was able to achieve a much more even seam than by free-handing.

What I'd do differently: I didn’t square the essex before cutting the placemats. The finished objects turned out just fine, but now that I’ve learned how to square fabric for quilting, I’d do this step before making any rectangular home goods.

Care: Machine wash in cold water. Lay flat to dry, then iron. They’ve also ended up in the dryer and it wasn’t the end of the world.

P5310414.JPG

Summer Bear Jacket

IMG_20200221_132517.jpg
P2210304 (1).JPG

This jacket is like a hug. I purchased the fabric back in June on my first trip to Stonemountain Fabric, where I spent an hour just wandering in awe of their overwhelming selection. I had no idea how to pick fabric but I walked out with this combo--kudos, Past Lauren. While sewing it I encountered a few "make it work" moments, particularly with the collar, but the imperfections are a nice reminder that I've progressed far enough to improvise when things go sideways, and that there's still more to master.

Pattern: Wiksten Jacket in size XL made in 100% cotton ikat (exterior) and 100% mariners cloth (lining). Didn't add exterior pockets, but might make one on the inside.

New skills: Sewing/attaching a lining, experimenting with cutting fabric across the grain (specifically the lining), pattern matching

Lessons: The pattern calls for interfacing, and I'm here to warn you: tread lightly! Using 2 layers of featherweight in the collar made it very crispy and the bottom of the collar stuck out aggressively; I ended up detaching the collar and removing both layers, but the collar piece got stretched out and had to be shortened.

Iron-on interfacing doesn't stick very well to textured fabric like mariners cloth.

A sharp seam ripper is a happy seam ripper, but it's easy to snag your fabric. I fixed the rip by sewing a very short zig zag stitch over the damaged area.

Use serger thread that matches your fabric so that if a serged seam accidentally shows it blends in.

What I'd do differently: Add a running stitch around the raw edge of the collar and neck to prevent it from stretching. Iron the fabric before cutting pattern pieces - I thought it was pretty wrinkle free and a took a shortcut, but there was a single crease that caused one of the front panels to be too long. I think I'd add a running stitch along the bottom hem too, because as the mariners cloth relaxes, the lining is starting to show below the hem.

Care: Hand wash, lay flat to dry.


P2210290.JPG
P2210301c.jpg