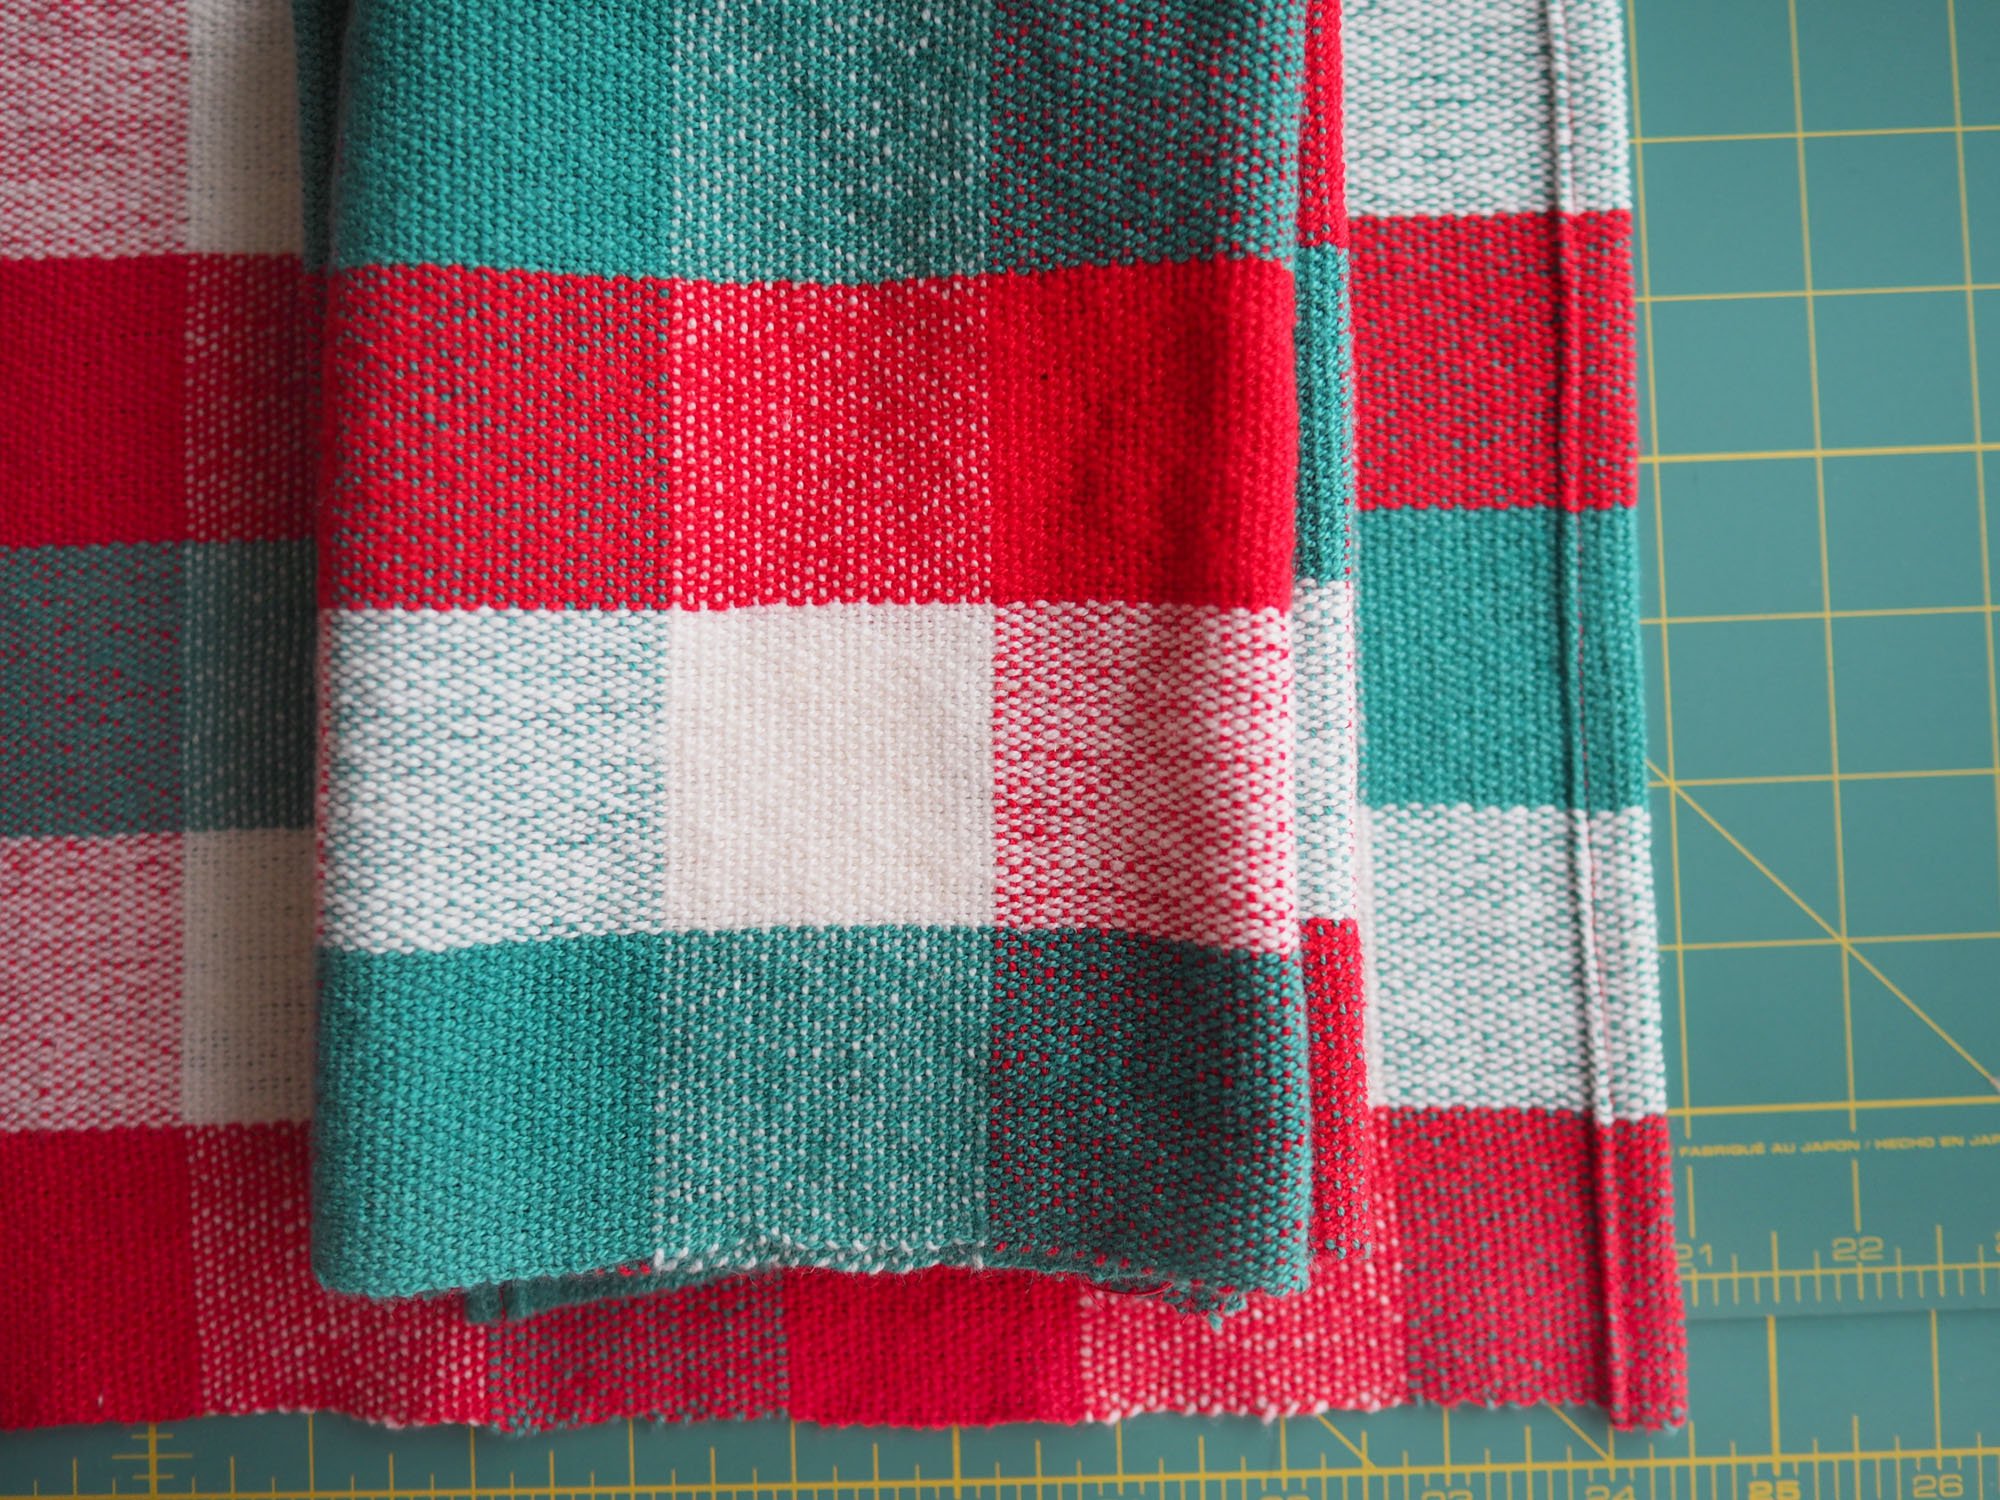
Cottolin Kitchen Towels
Pattern/Technique: Cottolin Kitchen Towels from Inventive Weaving on a Little Loom by Syne Mitchell. Used 4 yd warp length recommended in the pattern and got 4 towels total.
Modifications: none
Materials: 1 cone each of Bockens Cottolin 22/2 (60% cotton / 40% linen) in Medium Red 2020, Turquoise 2035, 1/2 Bleached 2000.
2 - 12.5 dent rigid heddles
Finished dimensions before washing (measured @ final towel): 27.75” L, 17.5” W
Finished dimensions after washing:
New skills: Weaving with two (!!) heddles, weaving with a boat shuttle
Lessons/Notes: My goal with this piece was to get better at making my selvedges even and I can certainly see an improvement between the beginning and the end of the piece. A lot of it is feel, but one adjustment in particular that helped was bubbling my weft (in a single arch across the width of the warp) rather than angling it.
I also noticed that warp tension is important to getting even PPI (picks per inch). You want even tension, but you don't want it cranked up to max, because it makes the heddles harder to move, and the distance between picks is longer because the warp threads can't flex as much to accommodate the weft thread.
Boat shuttles are awesome for thin thread but take some practice to throw consistently.
When beating a 2-heddle project, I used just a single heddle to beat. I would squeeze the weft with the heddle, then let it go in that position, then move my 2nd heddle into the dealeave that heddle loose at the left.
I used locking stitch markers to count my three-color repeats (each towel had 3) while the cloth was wrapped on the front beam, and used different colored locking markers to delineate between towels. (i.e. 3 red markers for towel 1, 3 yellow markers for towel 2, 3 green markers for towel 3, etc.)
I also weave 2 half passes of white thread between towels to separate them, and have a visual indicator while I'm zigzag stitching them.
I need to be careful when taking cloth off the loom. When I removed it, it snagged on a wing nut on the bottom brace of my loom stand and made a hole. Hopefully it will close up after washing!
Before washing, I zigzag stitched the front and back edges of the cloth. Then I washed the whole cloth, then zig zag stitched 2x at the 2 picks of contrast thread between towels, then used a rotary cutter to cut out each towel (between the zigzags).
When using 2 heddles there is a bit of clustering of warp threads (you can see the subtle striping running along the warp in the photo below) because there are 2 warp thread running through the front heddle. This did go away after washing, so not a concern.
I noticed on the last towel in particular I had some warp and weft floats, so tension is a thing to keep an eye on when reaching the end of a warp. I also recall reading an article about warping that you should resist the urge to finger-comb your warp threads while warping because that will introduce tension issues. Instead you should let the heddle do the combing as you wind on your warp. I'll try that out on my next project.
I use the last bit of warp to play with random patterns/textures and I started weaving these thinner stripes in red and white, which started me thinking about rhythm and syncopation and patterns (e.g. what does it sound like when 1 person claps in 3/4 time and another claps in 2/4 time). And then that spooled out into thinking about if/how you could use weaving to represent note length and time signatures.
For example, in the picture above the warp might represent the time signature (3/4 time) while the weft blocks represent the length of individual notes - 4 eighth notes in red and white (where the ratio of the warp width to weft length is 2:1), followed by a half note in teal (where the ratio of the warp width to weft length is 1:2), followed by a quarter note in white (where the ratio of the warp width to weft length is 1:1).
I would love to explore this concept further, and maybe even weave something like Clapping Music by Steve Reich. I'm envisioning the left 1/3 of the warp being part 1, the 1/3 being part 2, and the middle being where they interleave.
NB: I was thinking about this a bit more and wanted to make some meta-commentary about the magic of playing/exploring without expectation which sparked a train of thought that carried me to this exciting creative idea. I often have to force myself to think “creatively” for work—coming up with a product strategy, or a feature idea, or a solution for a problem. I put creatively in quotes because the obligation/expectation really squashes the essential organic/serendipitous component that's so essential to true creativity. Moreover, that knowledge work is mentally fatiguing and makes it harder for true organic creativity in leisure time. All this is to say: I've been feeling nebulous regret for a while about losing my creative spark and I'm overjoyed it's not lost so much as a seed underground, waiting to send out a little shoot of an idea when the conditions are right.
To separate and hem the towels I did the following:
Zig zag stitched at the end of each towel. I wove 2 half passes of white weft between each towel to use as a guide and used the standard zig zag settings on my machine, aligning the center of the presser foot between the white and first colored weft threads. Did this twice (once at each white weft) so that the top and bottom of each towel would be secured when I rotary cut between the white weft threads.
Quick press of the end of the towel to tighten up the weave
Did a double fold hem. Folded the hem once at 3/8”, then stuck pins in the ironing board to hold in place while pressing. Folded again at 3/8”, stuck pins in the ironing ironing board to hold in place while pressing. Took out the pins and used wonderclips to hold the hem in place for sewing (pinning warped the hem a lot since the fabric is quite thick and loosely woven).
Sewed the hem by aligning the center of the presser foot with the folded edge of the hem. I was having a bunch of trouble getting the feed dogs to engage at the start of the seam (even with my hump jumper tool) so I started the seam ~1” below the top of the towel, tacking at the start of the seam, sewed to the bottom of the towel, then flipped it over to tack and sew that last inch.


What I'd do differently: The length of my towels are a bit more than the pattern specified (27.75” vs. 25.5”) because I was repeating a specific number of threads on each repeat rather than measuring 2”, but I’m not particularly concerned given my focus on even selvedges for this project.
I also noticed after cutting my towels that there’s some length variation between each towel (likely due to different beating force with the heddle). Next time I should mark the order of the towels before separating so that I can compare the length/fabric quality of my first vs. last towel.
Care: Machine wash, tumble dry.


