Fremont Bag + Leather Keychain

ID: A waxed canvas purse with leather hardware and wool front pocket sits on a futon. A leather and brass keychain hangs from a d-ring on the purse handle.

This was a quick make (well, 2 days because I'm a slow sewist) that was immensely satisfying because I got more practice with zippers, linings, and hardware and created a finished object that looks so good.

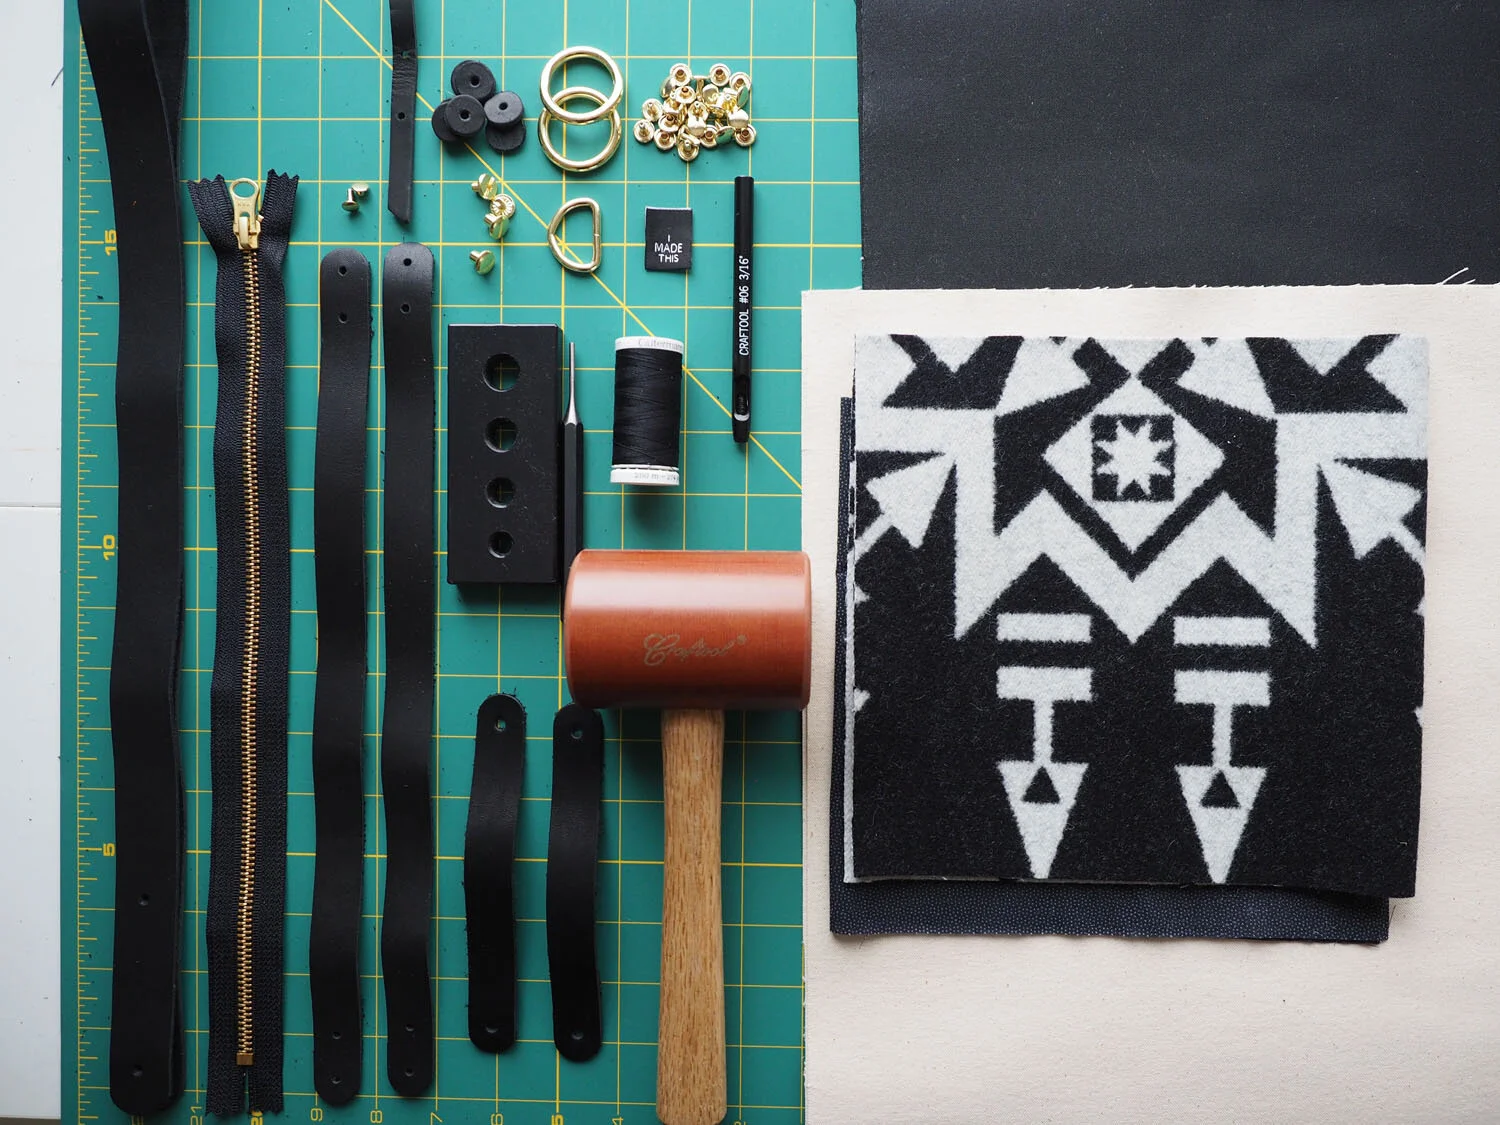
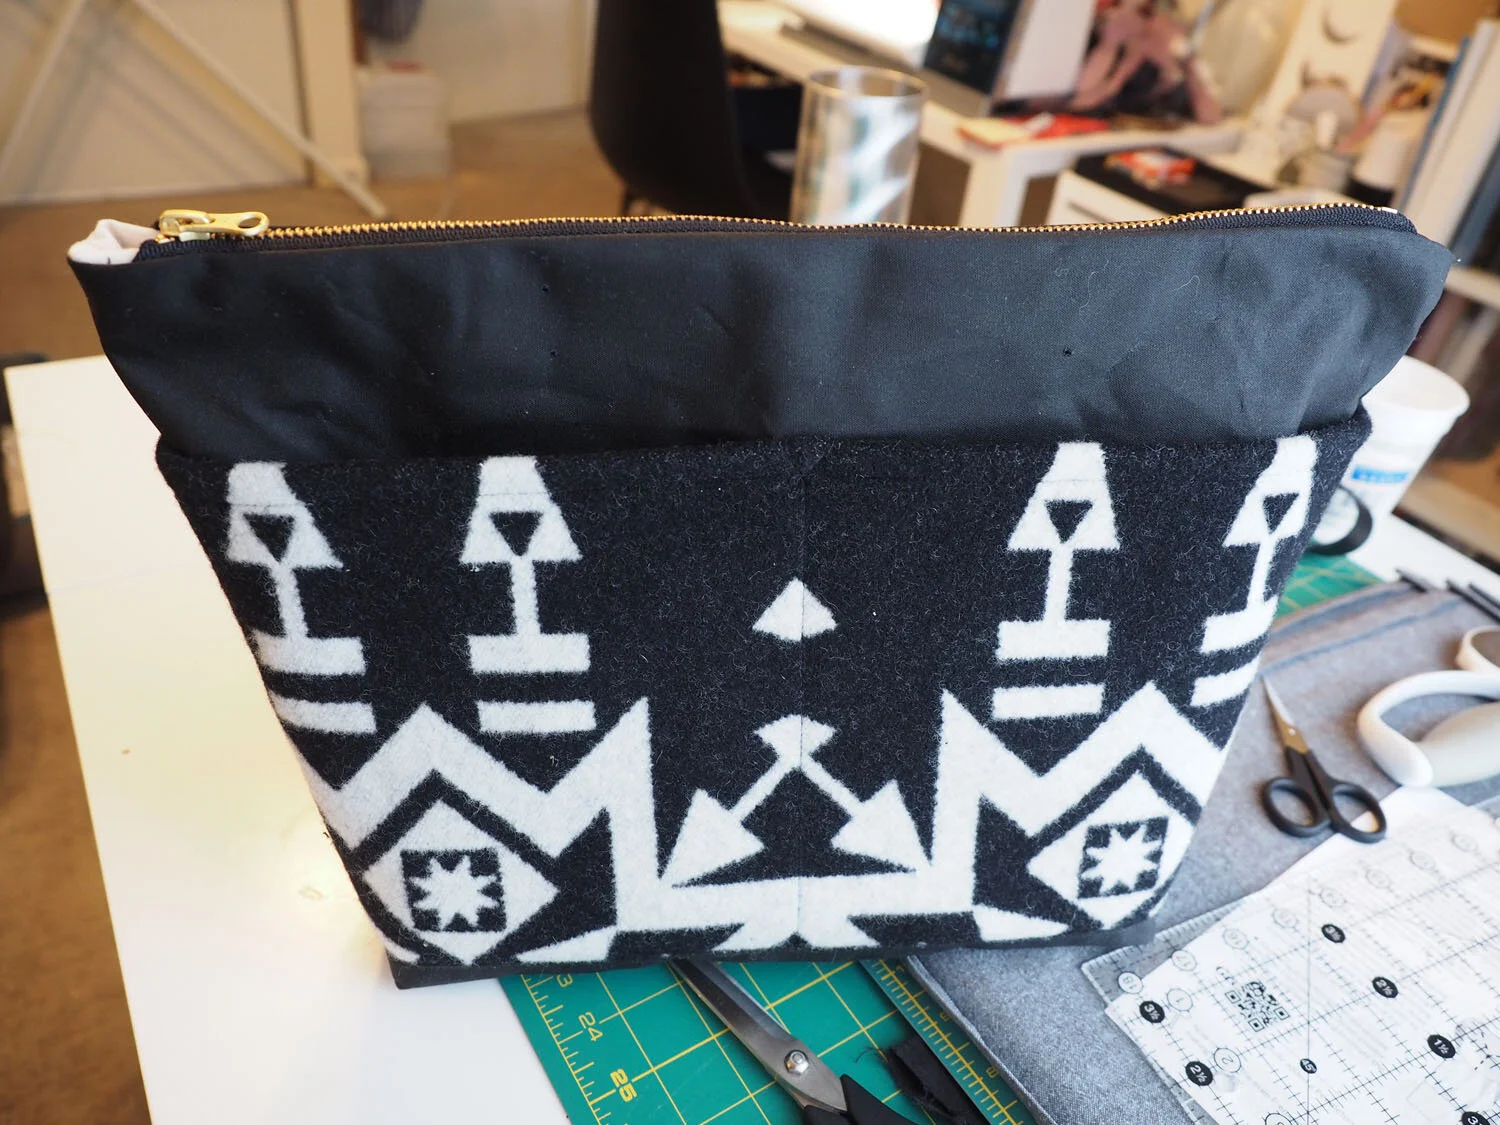
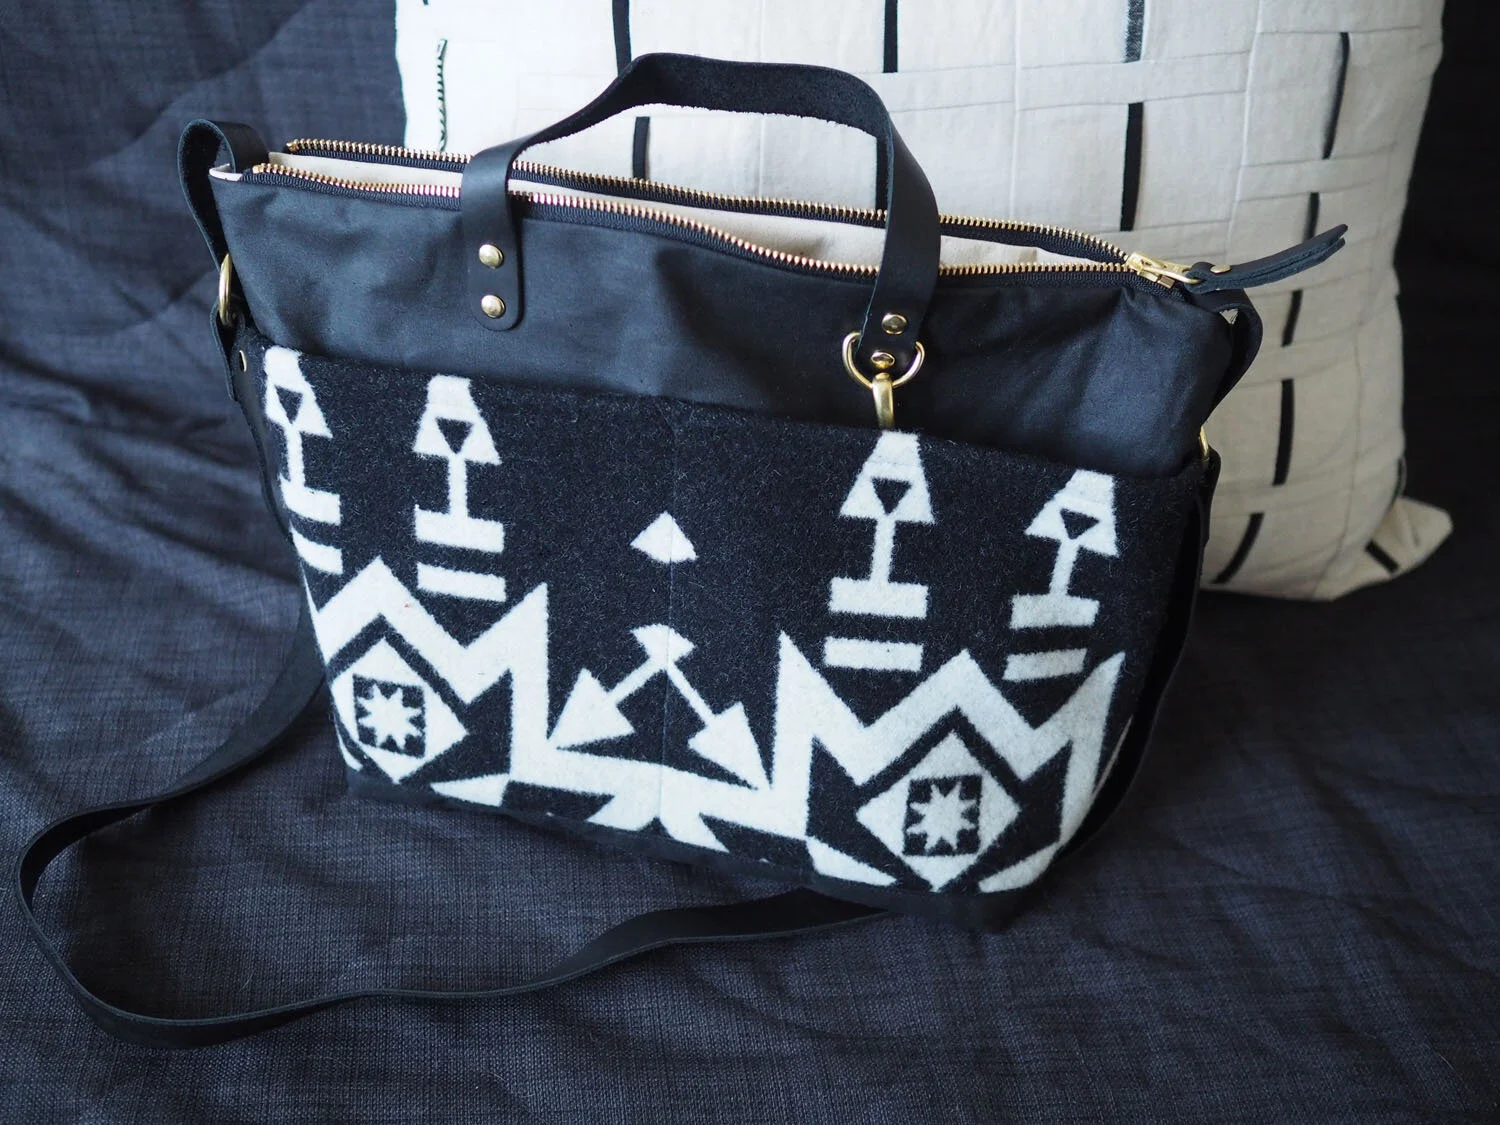
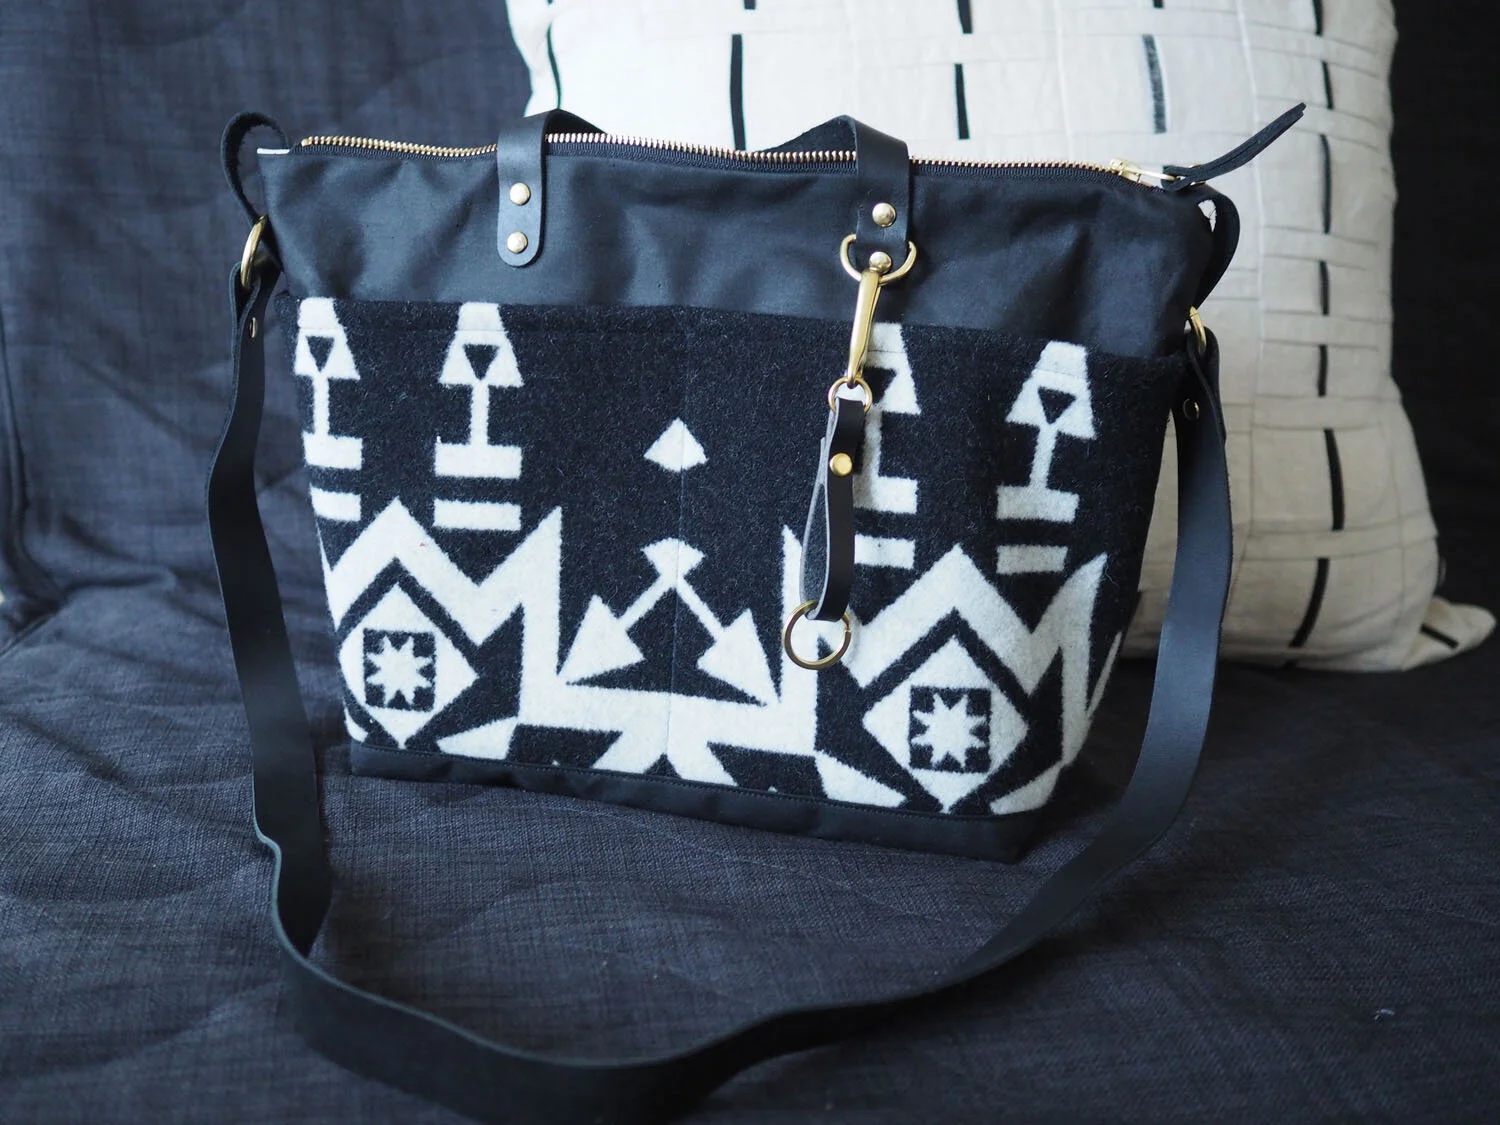
Pattern: Fremont bag kit (black waxed canvas and leather with brass hardware) with Pendleton exterior pocket expansion by Klum House. Leather Keyring kit in black by Klum House. Sewed with Gutermann polyester all-purpose thread in Black.

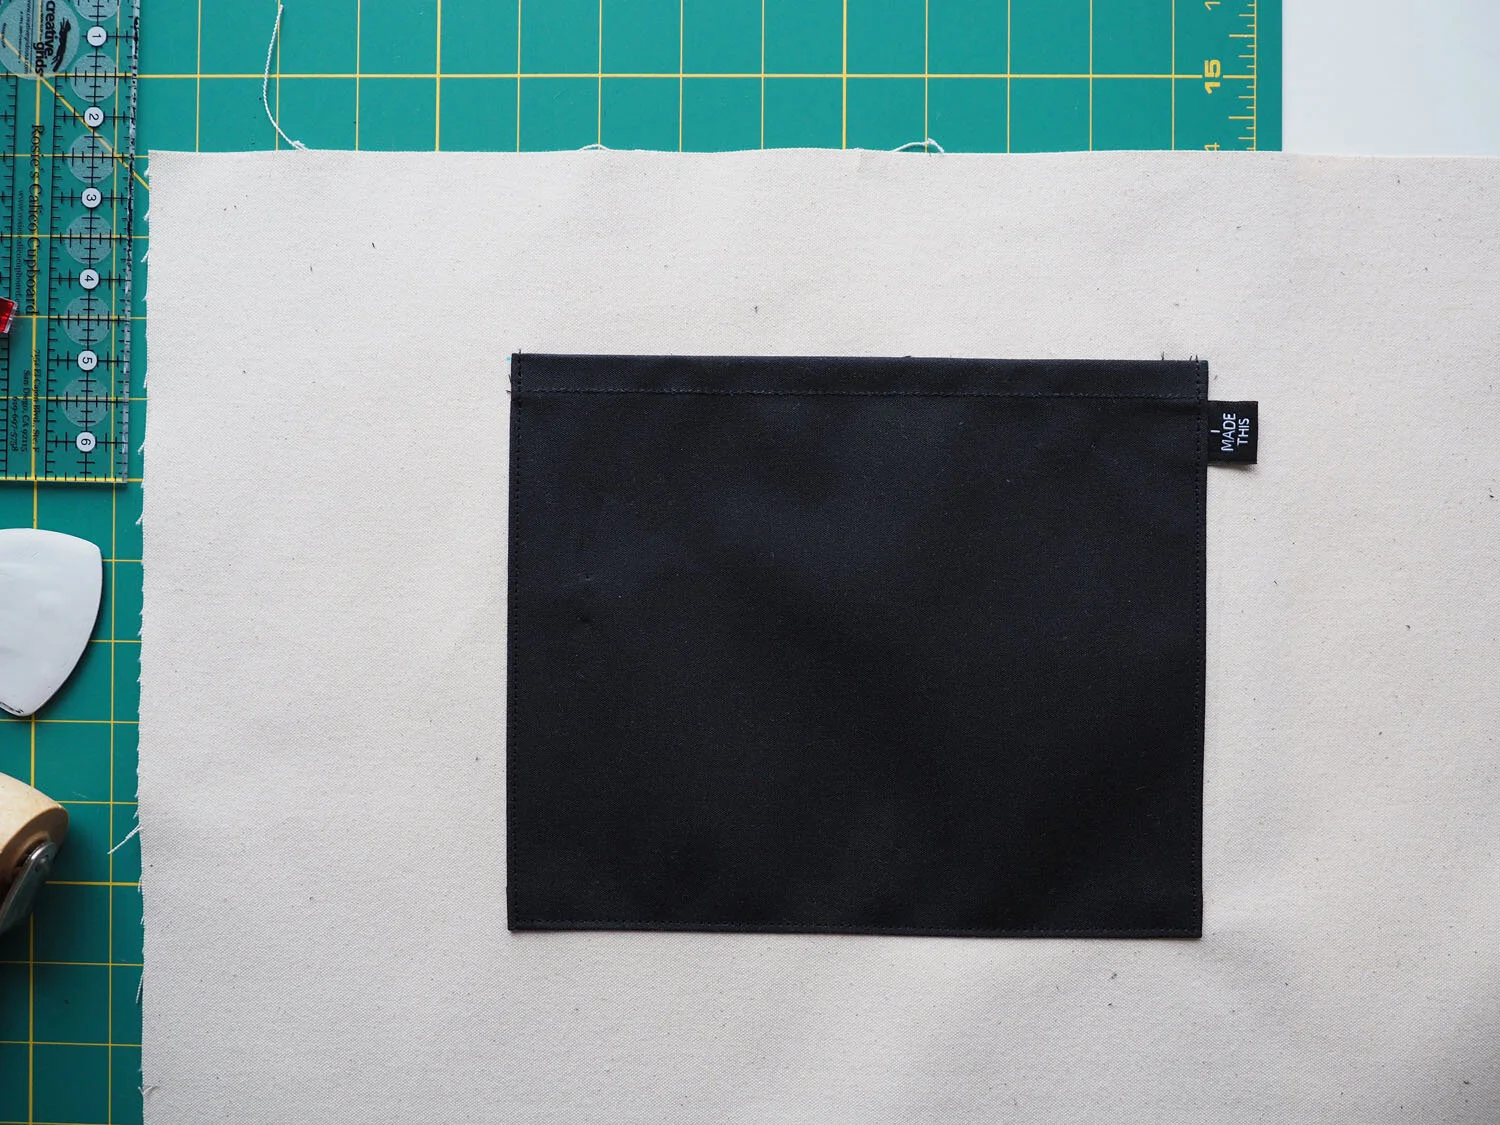
NB: The clarity and detail in Klum House patterns is seriously impressive. They anticipate problems and help you troubleshoot (like having a front pocket that's a little longer than the front exterior panel) and provide helpful tips to make the sewing process easier.

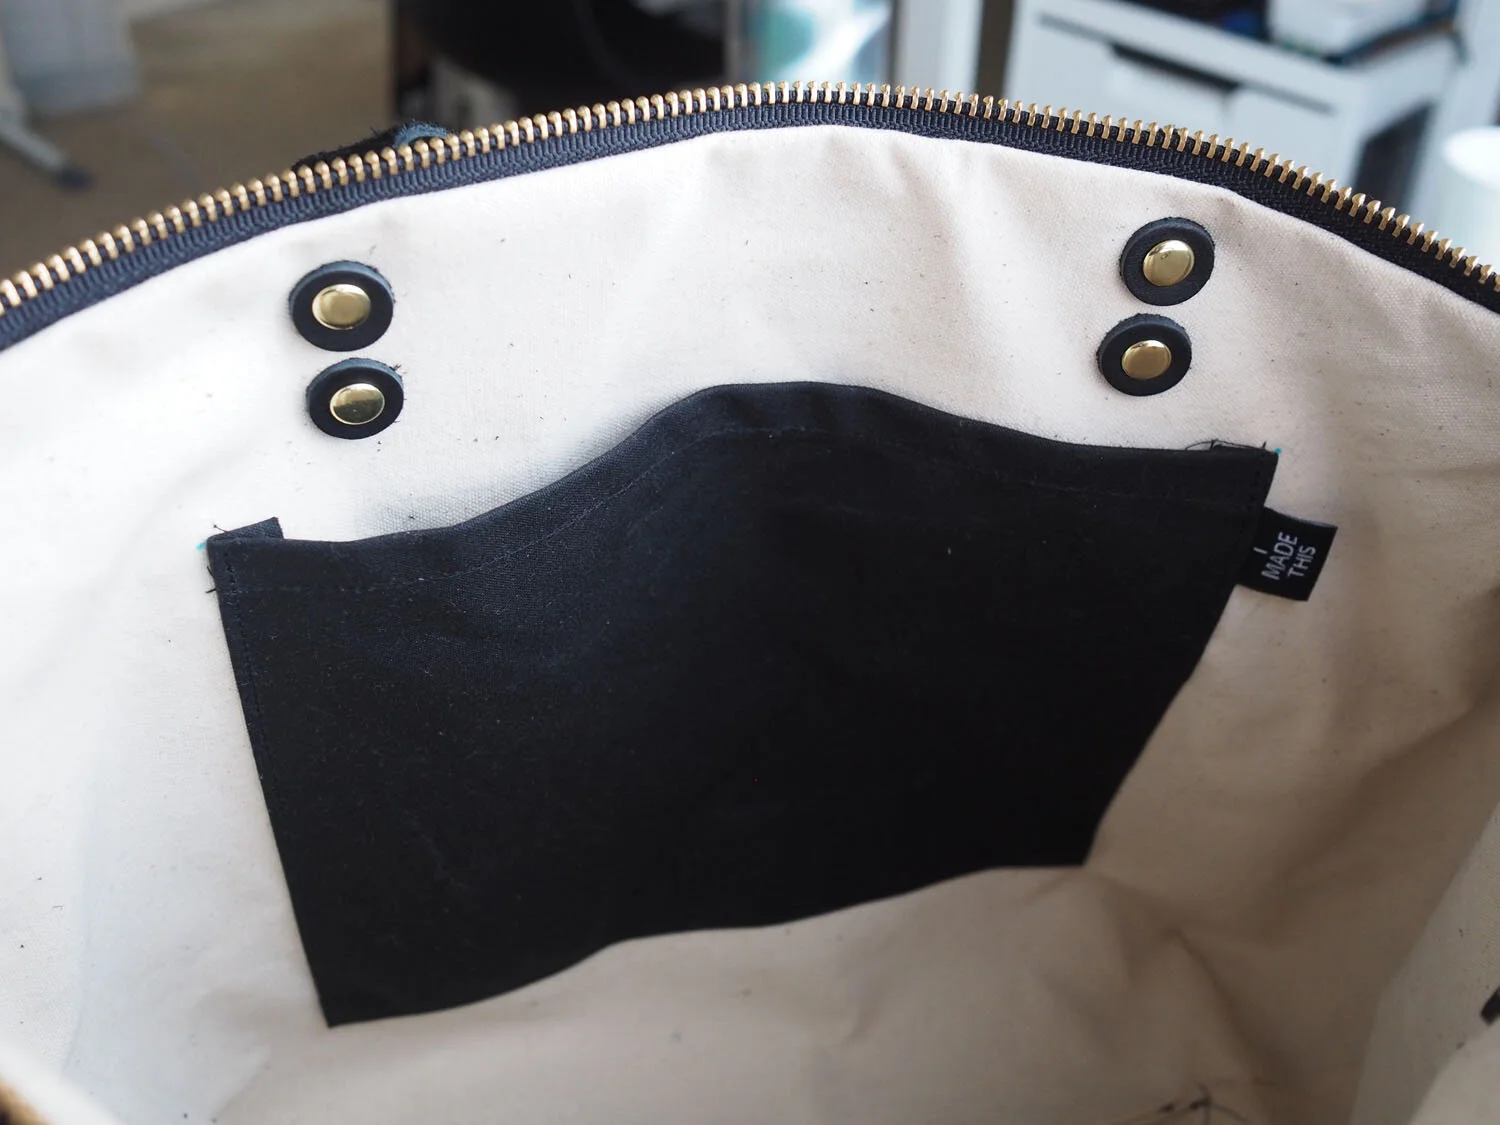
New skills: installing chicago screws

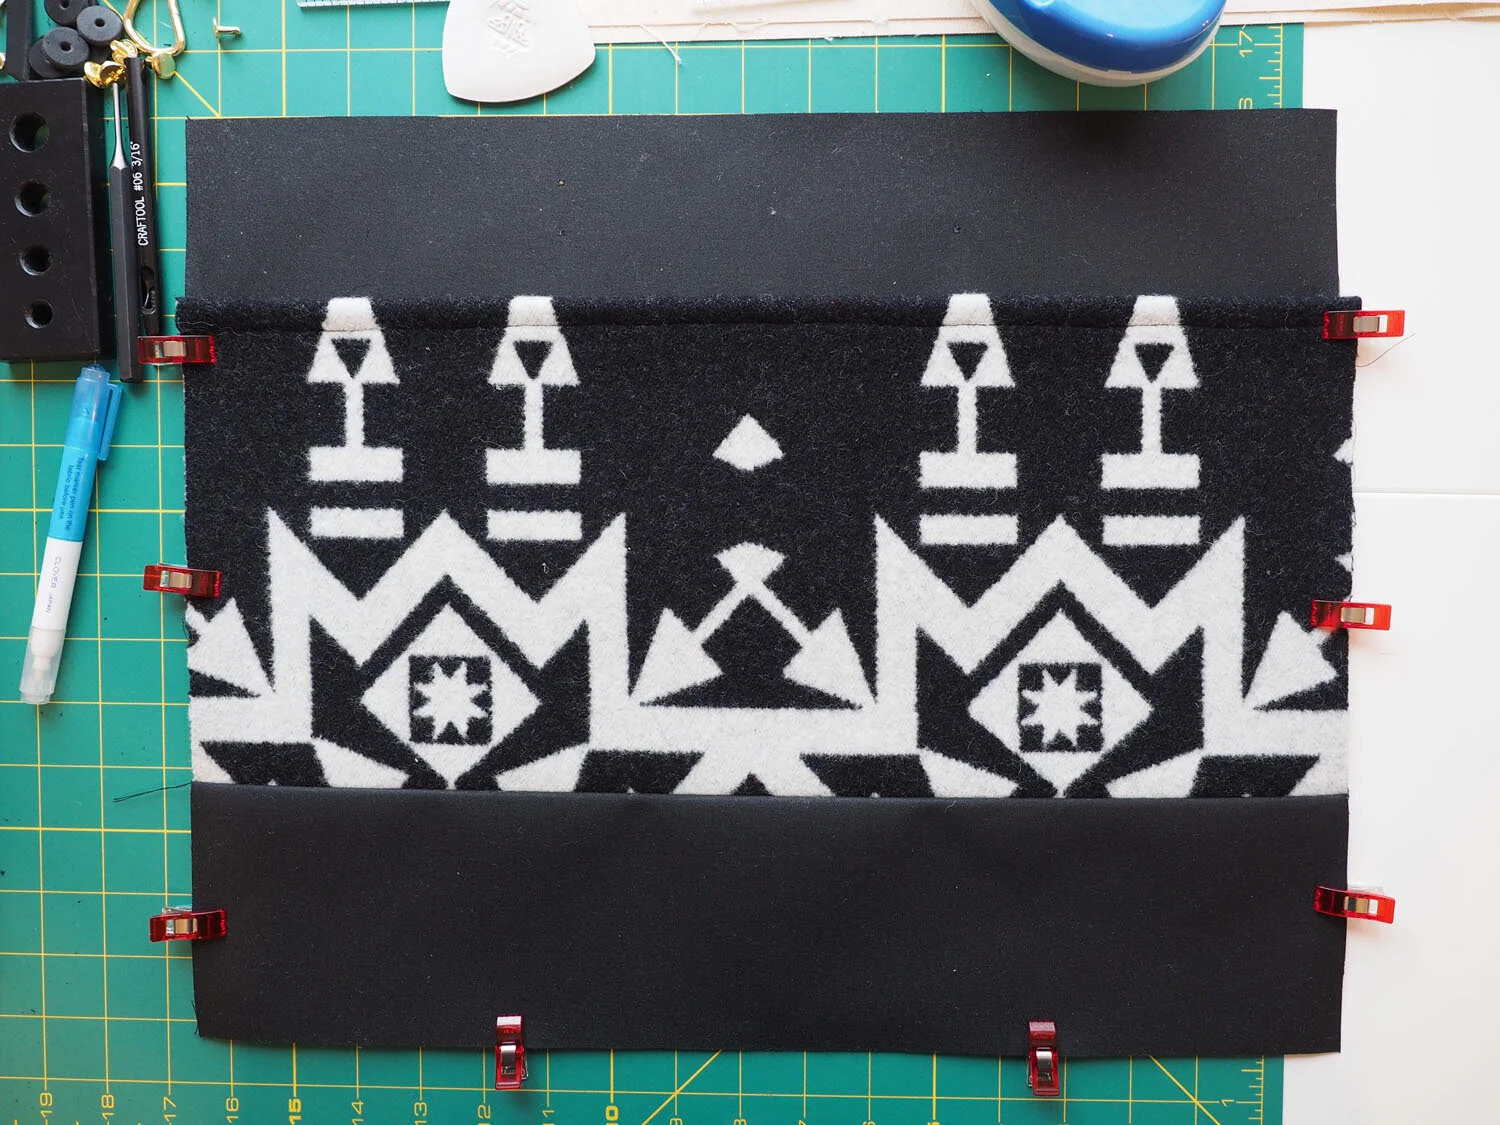
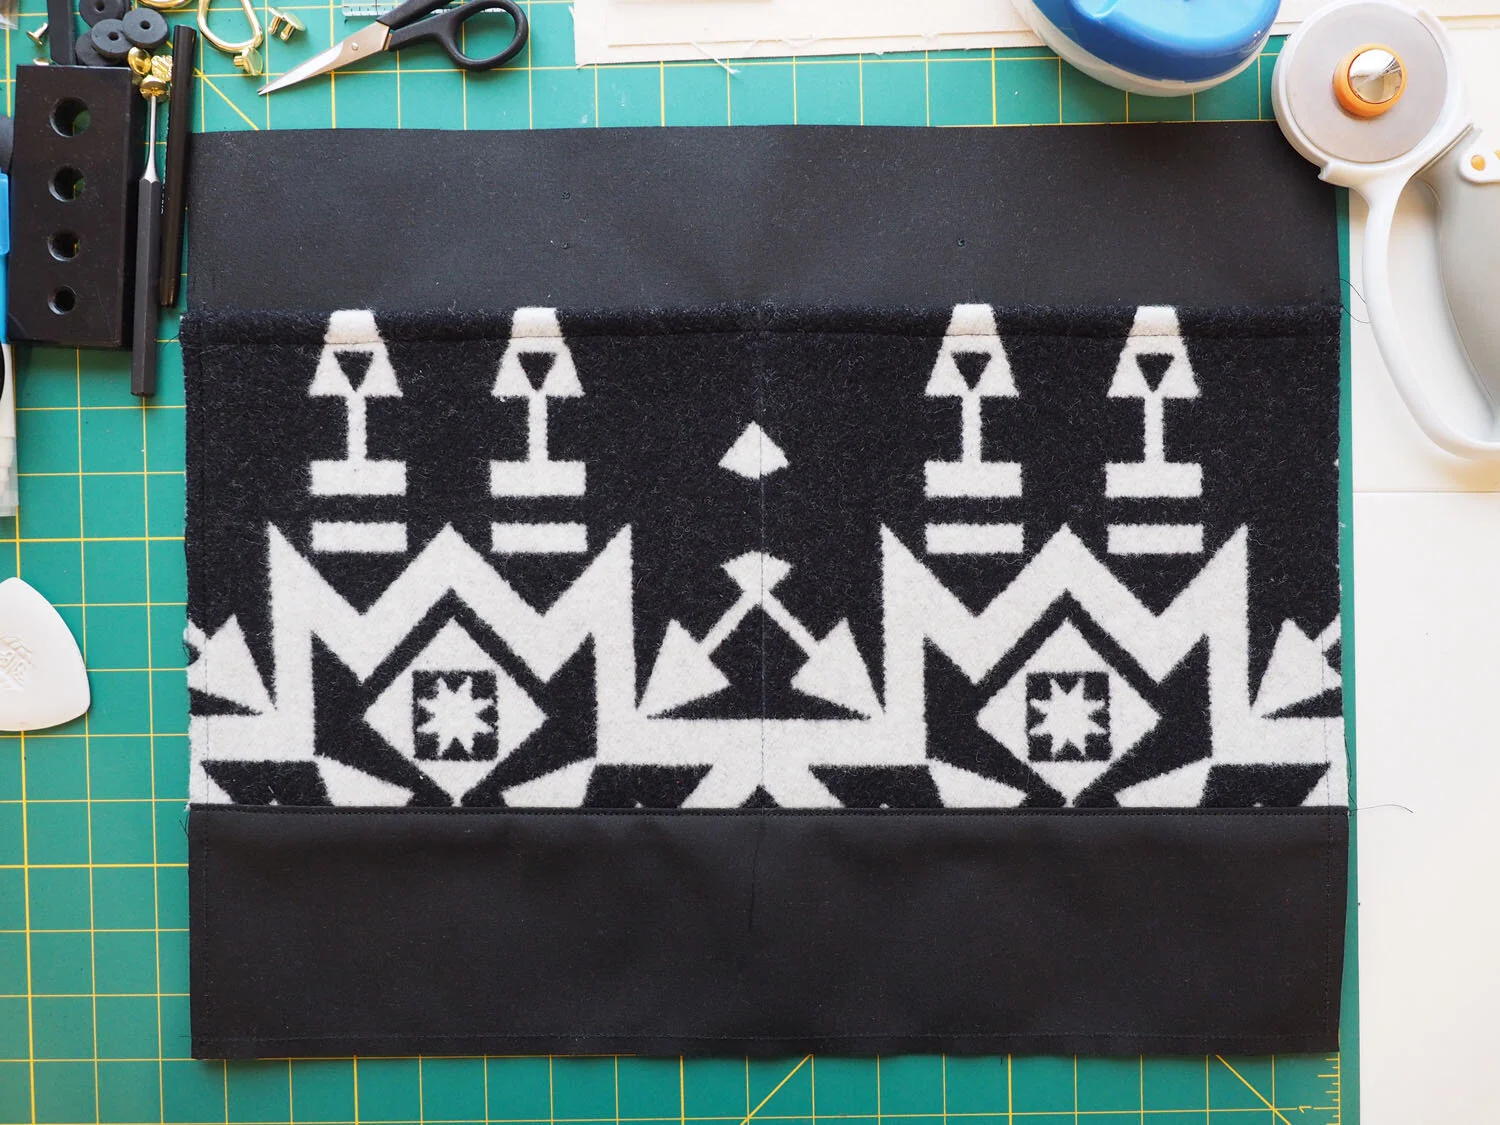
Lessons: Wool can be shifty/stretchy while sewing, so adding woven fusible interfacing will stabilize the fabric and prevent it from stretching.

A bi-level edge stitch foot (or a stitch in the ditch foot) are really helpful for making beautiful, straight edge stitching. Setting the needle position at 3mm will produce a lovely 1/8" seam allowance.

When boxing out seams at the bottom of a bag, pull out the fabric at the center of the bag to help align the raw edges of the box seam.

I got the best results with rivets using a regular hammer (heavier, so generates more force) and hammering on our crappy lino-covered concrete floors, and taking care to make sure the rivet was aligned vertically to prevent it from shifting / going crooked while hammering. Using a few light/medium taps on the lino sets the rivet without causing unsightly crimping from the post going into the cap.

3/32" punches are far easier to use than a 3/16" punch--the latter takes a lot of force to make a hole in 2 layers of fabric.

Use a bakelite mallet when striking the top of metal tools to prevent them from getting damaged.

The Klum House pouch was an excellent starter project before getting into the Fremont. It was a great way to practice all of the necessary skills before applying them to a larger (more expensive) kit.

When making a boxed bag bottom, an excellent technique is to mark the boxes, then sew the seam around the outside edge of the bag, backstitching over every box mark to strengthen the seam and prevent it from fraying while forming the box.

Fanning seam allowances (i.e. positioning them to opposite sides) is a great way to reduce bulk.

What I'd do differently: I maybe could have been a little fussier when positioning the front pocket so that I'd have a perfectly symmetrical pattern. (It was slightly longer then the front exterior panel, so I just lined up one edge and trimmed the other edge with the rotary cutter.) It's a very minor thing and really doesn't bother me.

Care: Spot clean

ID: A flat lay of the tools, fabric, and hardware I used to make the purse.

Test Drive Quilt

ID: A small quilt with geometric lines hangs on a wall next to a framed print of 16 ferrofluid patterns, with the corner of a mirror visible below the quilt.

In preparation for quilting my first large-ish quilt top, I wanted to get practice quilting a smaller piece. I followed the "test drive" steps that Jacquie Gering outlines in Walk to start getting my sea legs and test out the techniques I've read about in various quilting books (more on those below).

Pattern/Techniques: I followed the steps for straight line and angled quilting in the "test drive" section of Walk (p. 11). I then began improvising lines of different widths and creating simple crosshatch patterns. Lastly I practiced starting lines midway through the fabric (i.e. white thread) using the short stitches technique from Heirloom Machine Quilting by Harriet Hargrave.

I followed the instructions for binding a quilt from Quilters Academy Vol. 1 to create a 1/4" binding.

Made with 2 pieces of Kaufman 200 ct white muslin and Quilters Dream Select cotton batting. Binding made from the same fabric as the quilt top/backing.

New skills: Quilting with a walking foot, layering a quilt, pin basting, binding a quilt

Lessons: Pressure foot pressure can be lowered to reduce/prevent the fabric from puckering when quilting intersecting lines. The default pressure foot pressure on my machine is 6.5, and I had to lower the pressure to 4.5-5 to stop puckering.

Add small sharpie marks to your presser foot at key dimensions (e.g. the width from the edge of the presser foot to the needle) to act as guides for pivoting, which will result in even line spacing after the pivot.

Quilting angled seams can result in the fabric warping—it's possible this was exacerbated by being too stingy with the number of pins I used to baste.

I don't love Bohin curved size 2 pins for basting. A lot of them were hard to insert, and they left large visible holes in the quilt. I've ordered smaller size 1 curved pins to try them instead. (A pro tip from Gloria is to avoid pins with plastic grips because they take up more space and are harder to quilt around.)

Be thoughtful about pin placement—don't put pins right where the first seams will be quilted.

Don't close pins after they're removed—you're going to have to open them to baste the next quilt. Store them open to save the extra effort.

Bring the bobbin thread up at the start of a seam (press needle down then needle up) to prevent a thread nest forming. An angled tweezer can be used the pull the bobbin thread if it's quite short, saving your fingers from being accidentally stabbed by the needle.

If there's a low bobbin thread warning while sewing, change the bobbin before starting the next seam. I didn't do this and ran out of bobbin thread mid-seam.

When hand sewing the back of the binding, double check to make sure you haven't sewn through to the front of the quilt. I did this a few times by accident. Check in particular if the needle requires more force to insert than usual. Quilting betweens needles are super handy for sewing a binding.

Harriet Hargrave's instructions for getting mitered corners on a quilt binding are excellent (Ref: Quilters Academy Vol. 1).

What I'd do differently: My goal was purely to practice and I had no expectations for the final product—the fact that it turned into something I genuinely liked was pure serendipity.

ID: A small white quilt with geometric lines in dark thread.