Red Sling Bag

Pattern/Technique: Fanny Pack by Sew Joyful Studio. Note: even though I’m pretty sure I printed the pattern pieces at 100% scale, all of the pieces were slightly too small, so I had to measure everything manually.

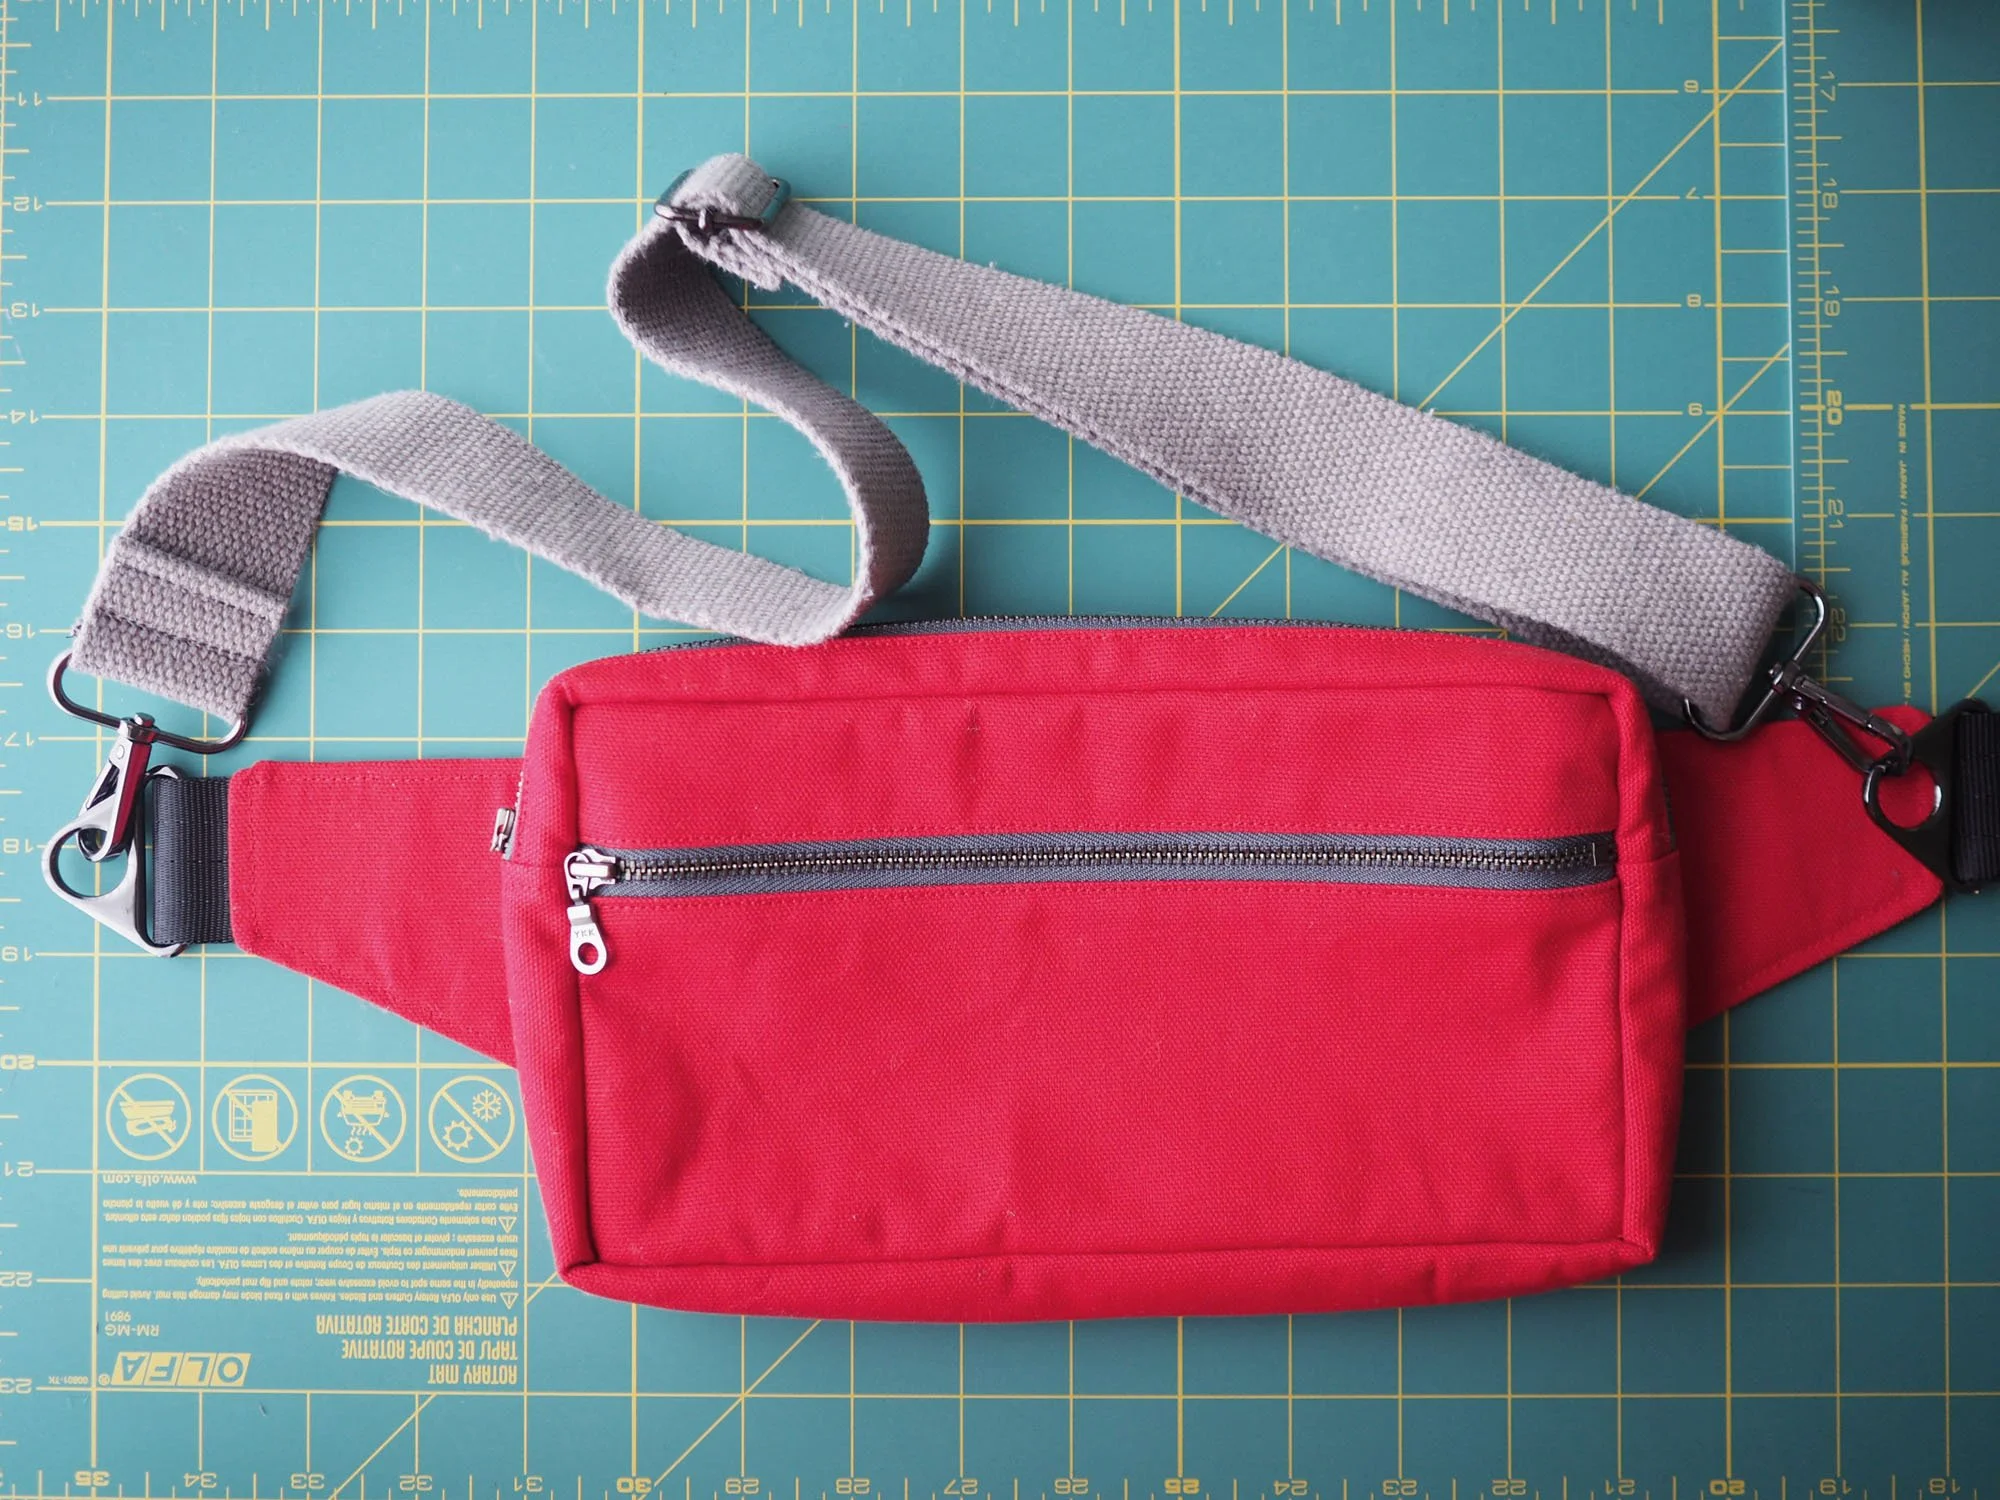
Modifications: Used 1.5” webbing instead of the 1” webbing specified. Increased the side wing pattern pieces by 1/2” where the webbing is attached.

I found a cool drop in lining tutorial: https://sewingtherapy.net/fennel-fanny-pack-sew-along-tutorial/ though I decided to not go this route on my first run through this pattern (in retrospect a very good plan).

Instead of sewing the belt webbing to the side wings, I instead attached 2 triangle rings so that I could make the belt interchangeable—I have an eventual plan to make a handwoven strap using an inkle loom (!). I cut a 2” long strip of seat belt webbing and threaded it through the triangle ring, then tucked the ends into the fold of the wing piece as instructed.

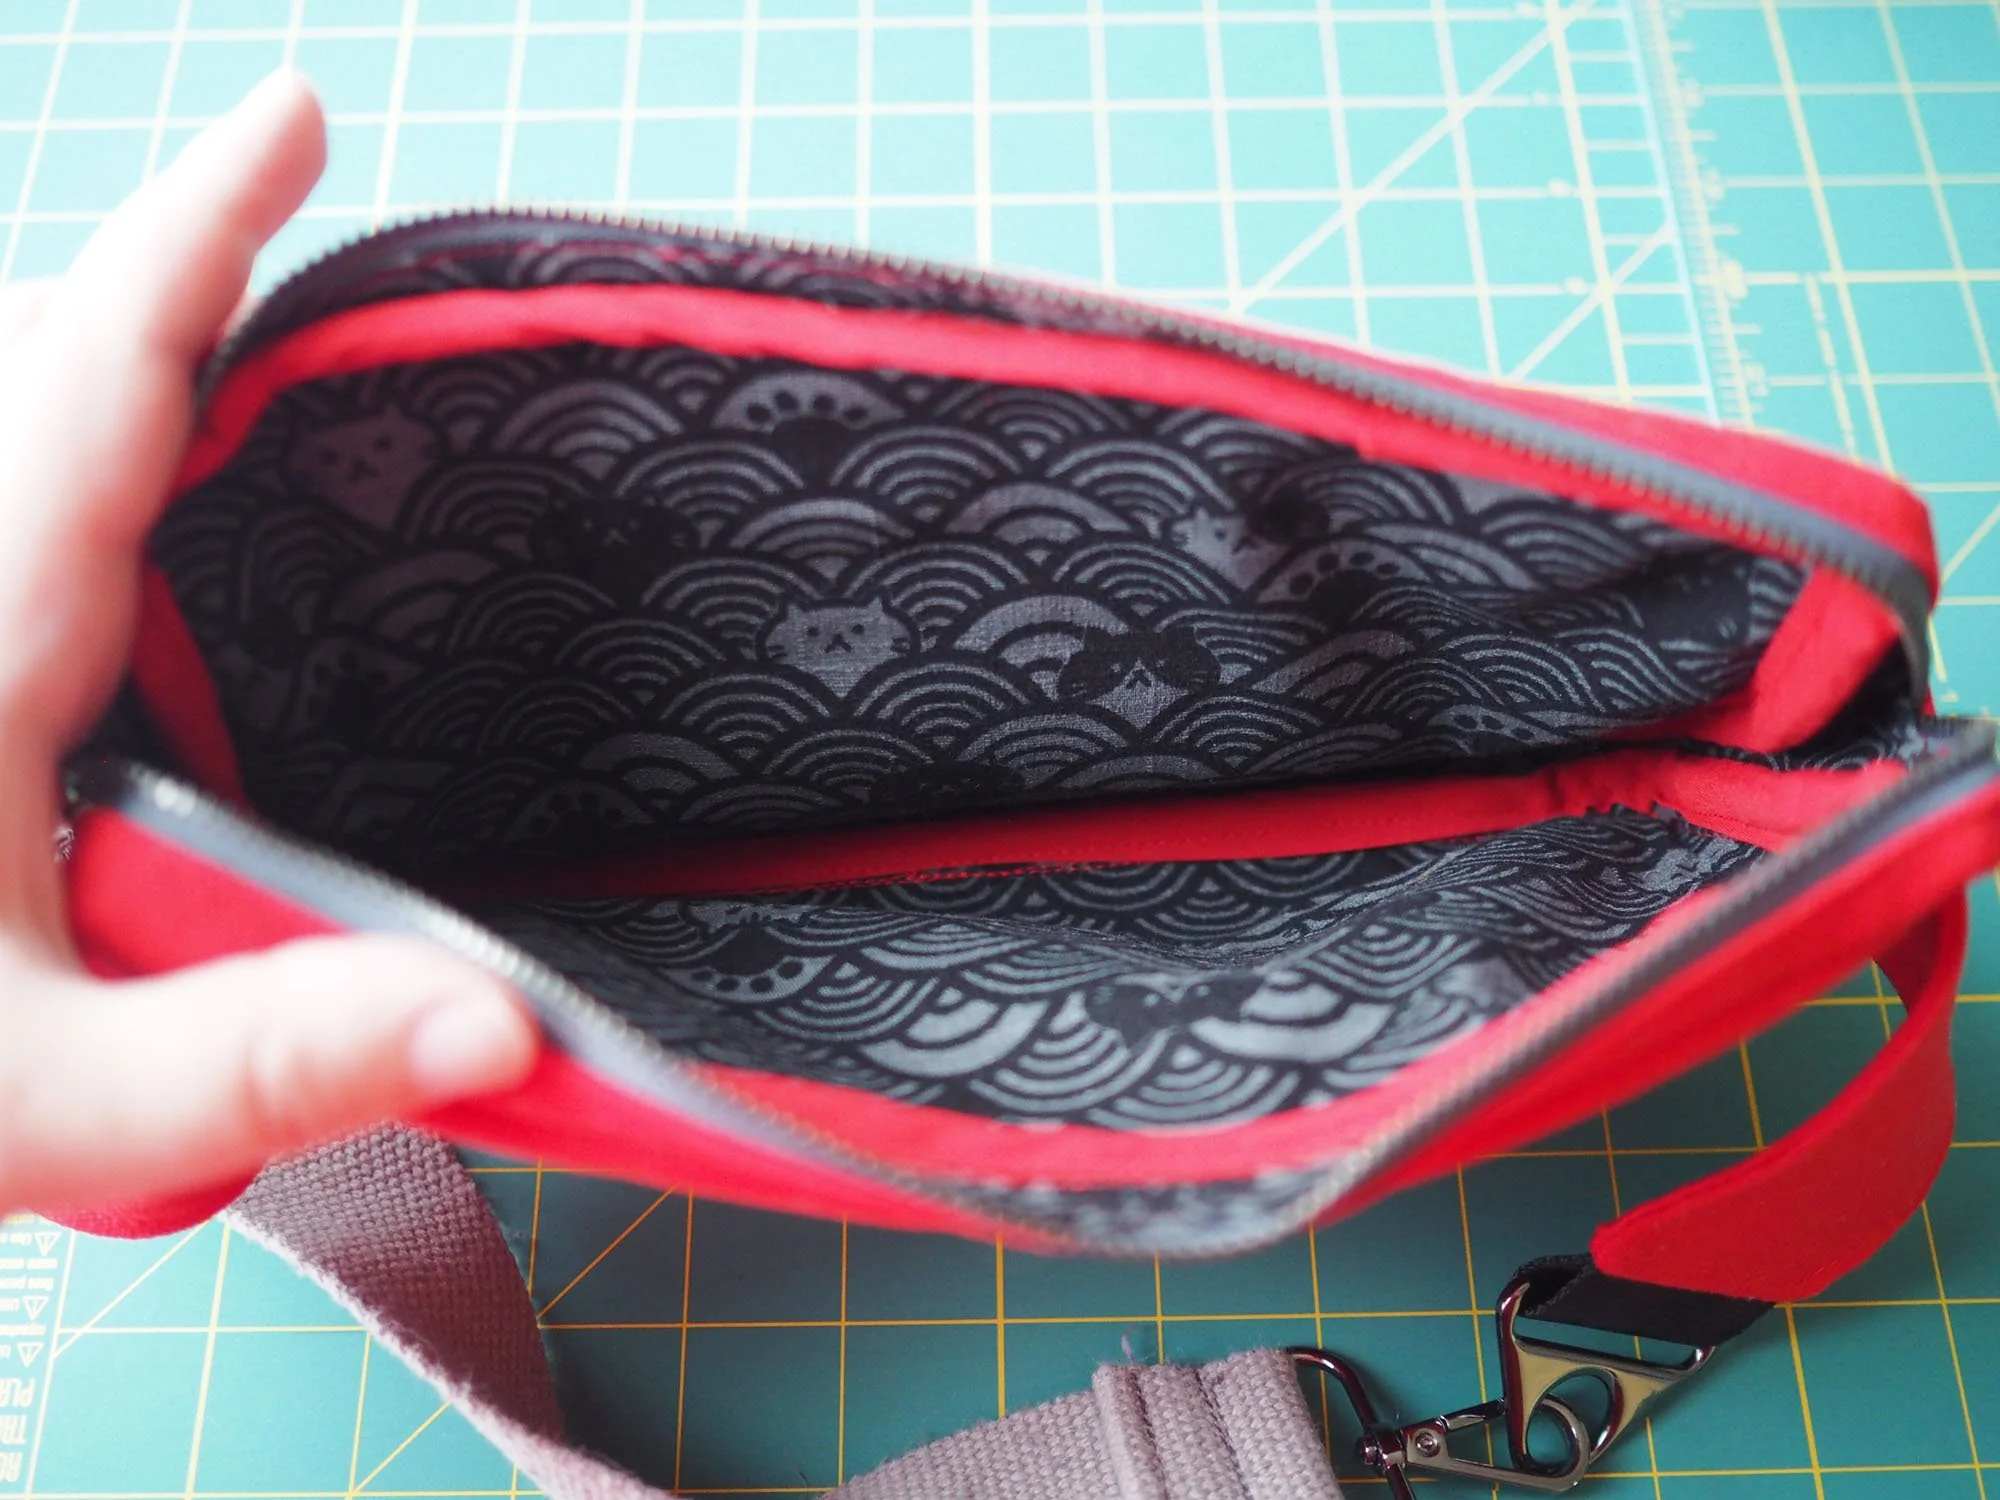
Materials: 1/4 yd red cotton canvas, 1 fat quarter quilting cotton (I bought this super cute cat print at the Road to California quilt show in 2021.)

Notions:

New skills: n/a

Lessons & Techniques: I ended up trying a few different sewing needle sizes - an 80/12 Universal and Microtex both had intermittent skipped stitches (1 stitch in a seam), a 100/16 chrome jeans needle punched really large holes, and a 90/14 universal needle seemed to hit the sweet spot with no skips and no holes.

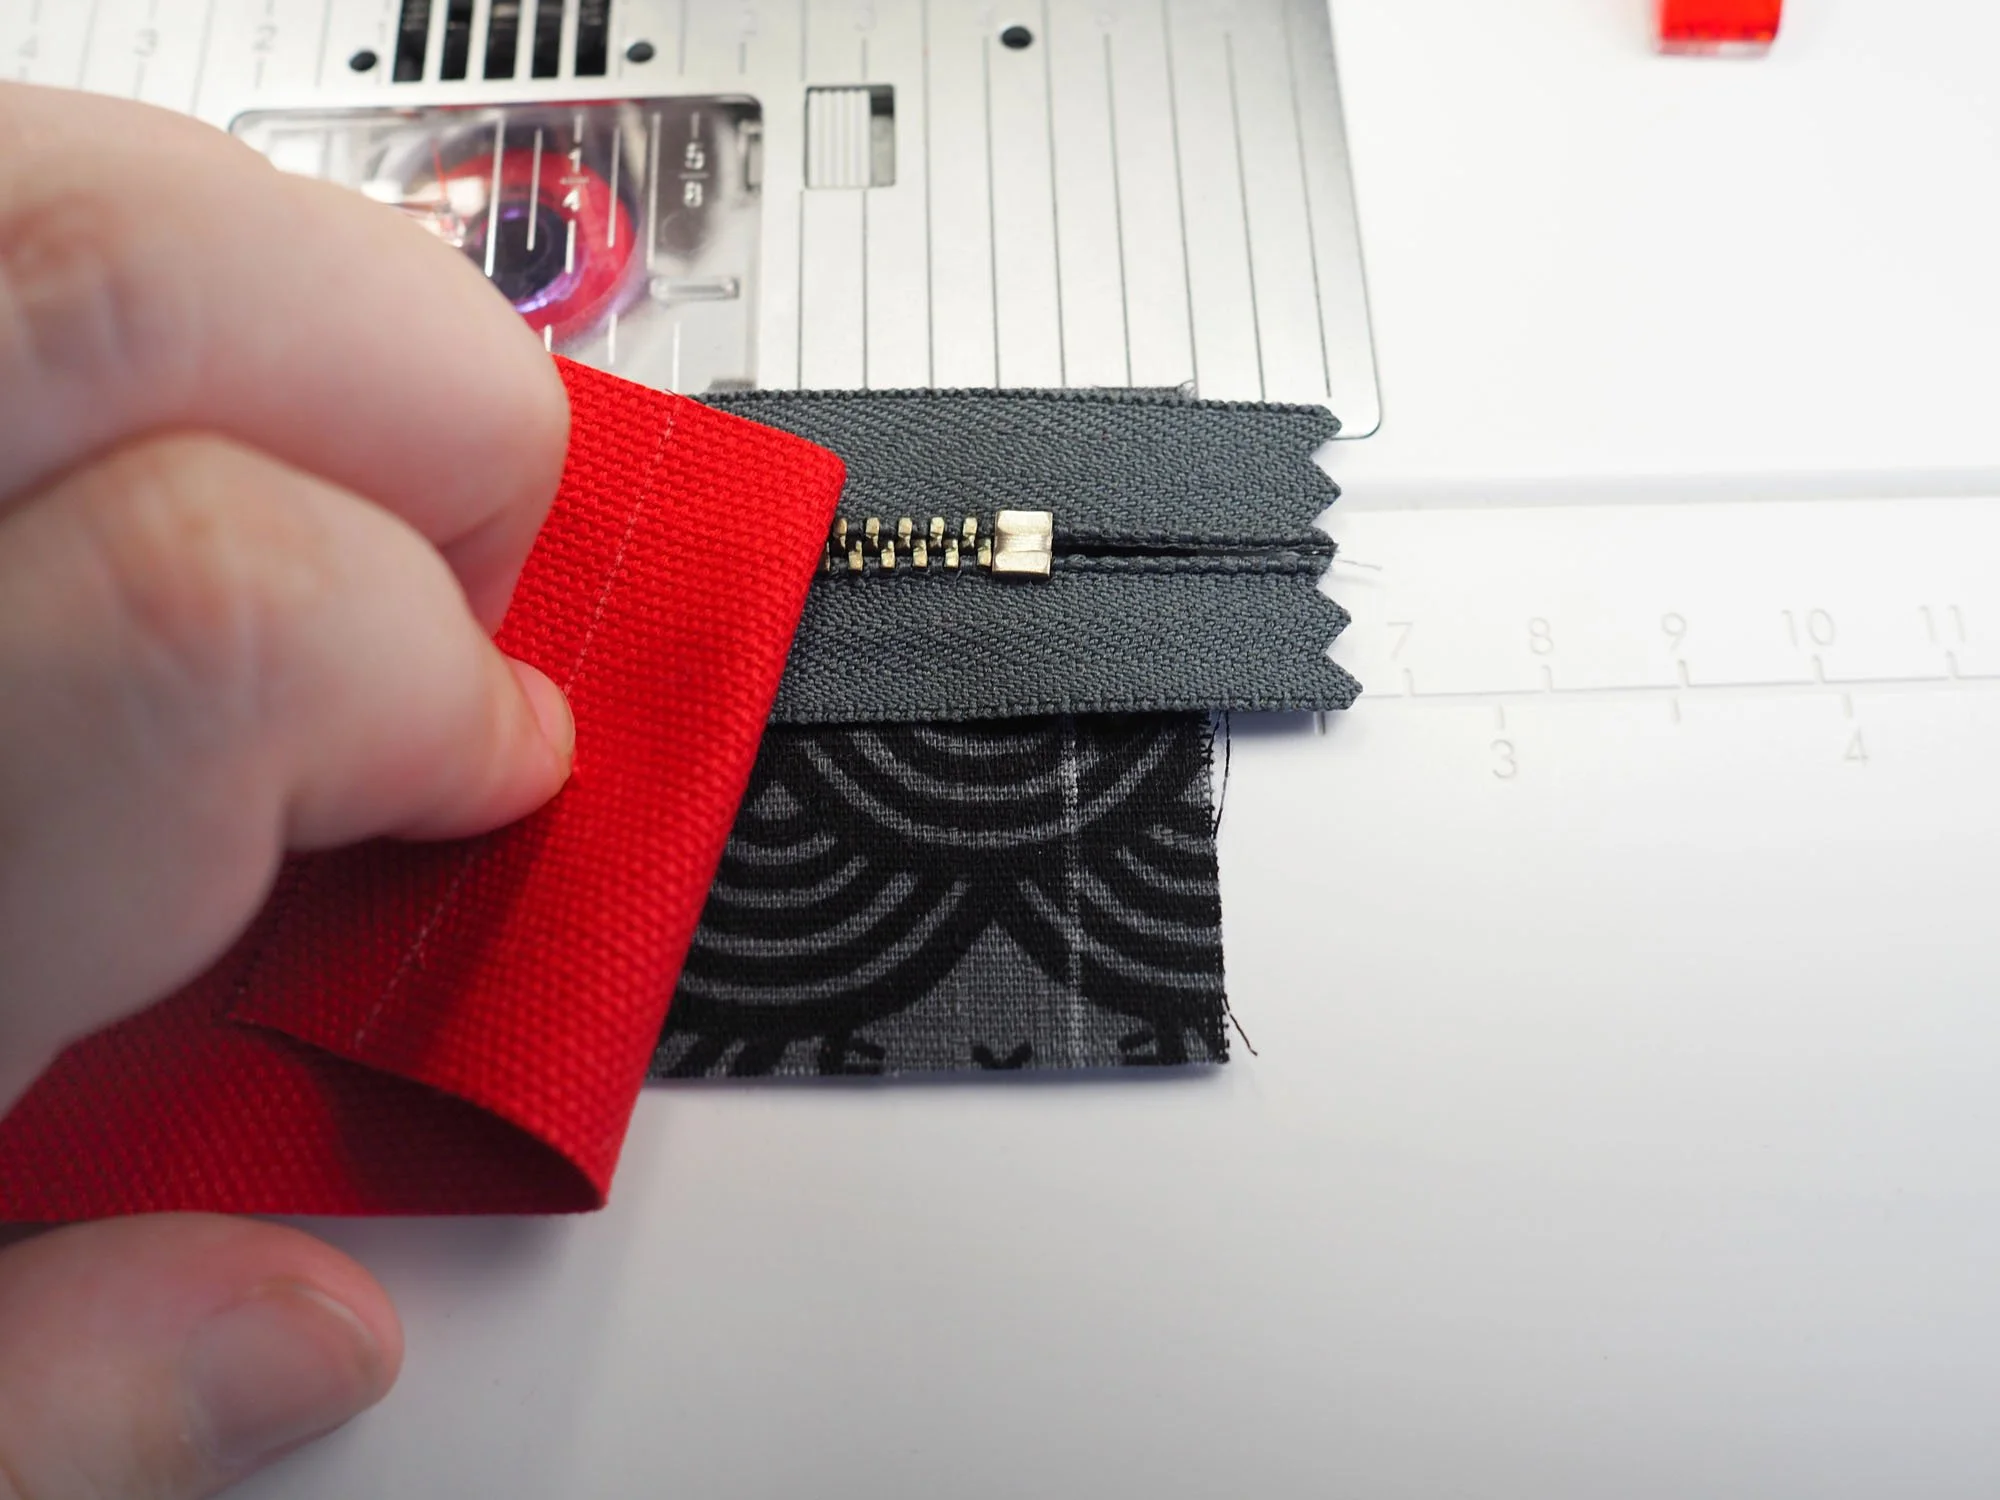
The pattern specified a 10” and 14” zipper, however, the actual pattern pieces where you’re attaching the zippers are 10” and 13”. Because I used metal zippers, I positioned the bottom zipper stops 3/8” in from the edge so they wouldn’t be in the seam allowance, and then sewed very carefully where the zipper teeth overlapped with the seam.

Side wings:

  • When sewing the webbing to the side wing pieces, I decided to baste the webbing in place before sewing the 1/4” seam around the piece. This was super handy because gave me a guide for my pivots.

  • Before turning the side wings right side out, I graded the seams.

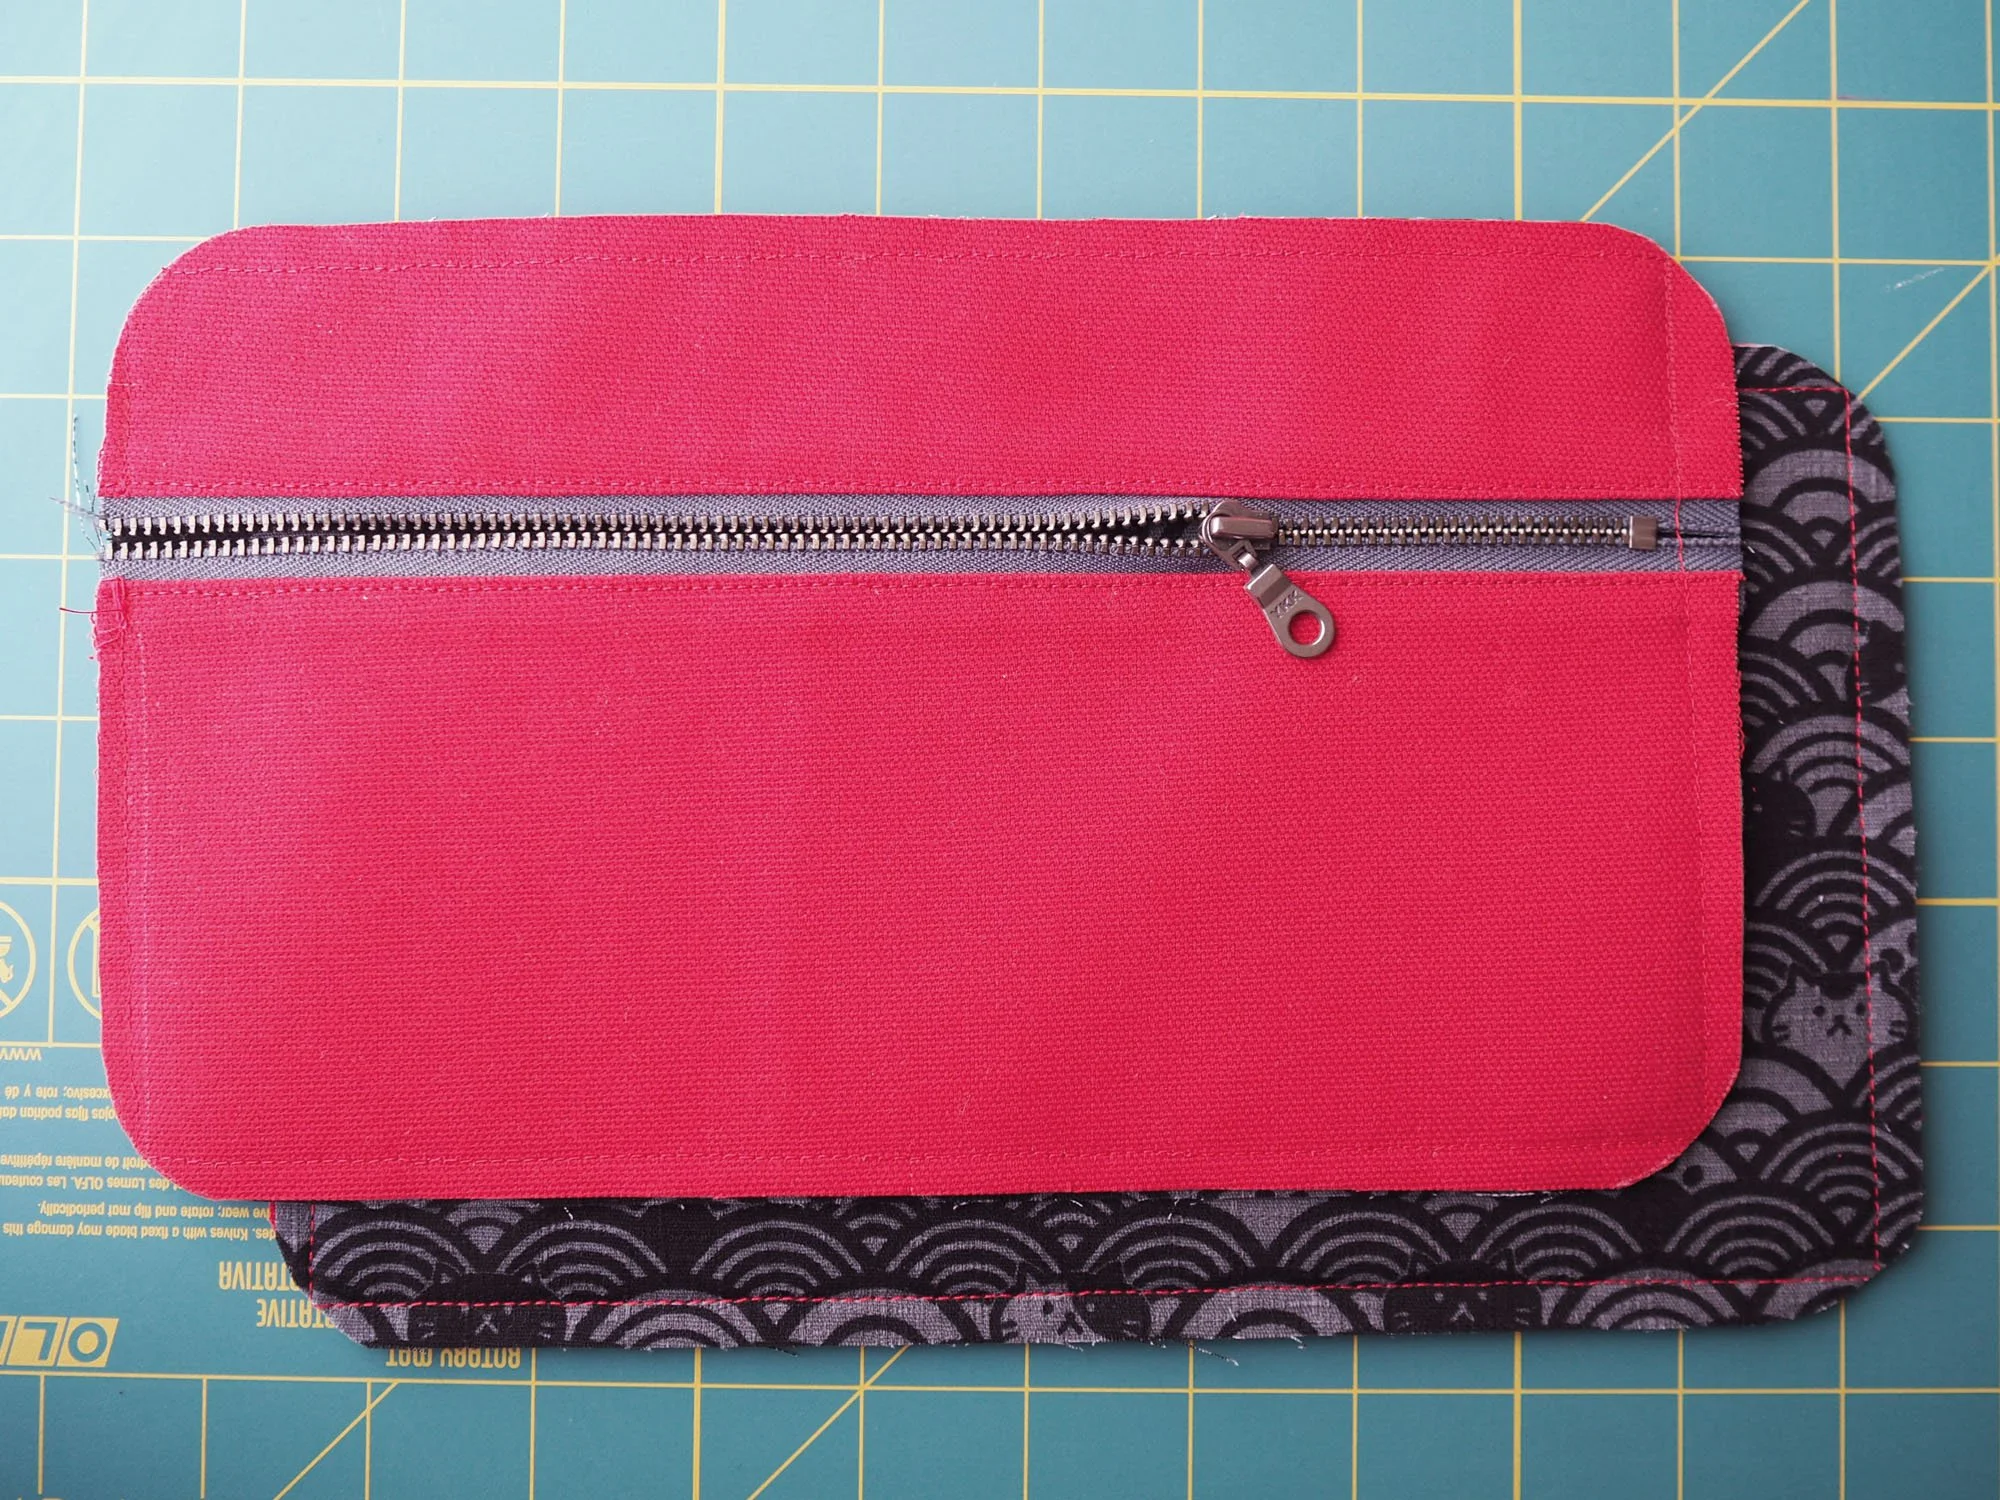
What I'd do differently: The pattern specified a 10” and 14” zipper, however, the actual pattern pieces where you’re attaching the zippers are 10” and 13”. Because I used metal zippers, I positioned the zipper stops 3/8” in from the edge so they wouldn’t be in the seam allowance, and then sewed very carefully where the zipper teeth overlapped with the seam. Next time, I’ll use shorter zippers (9” and 12”) so that I don’t need to make all of these adjustments. (Fig 1)

Fig 1: The metal zipper I used extended beyond the seam, making sewing a challenge

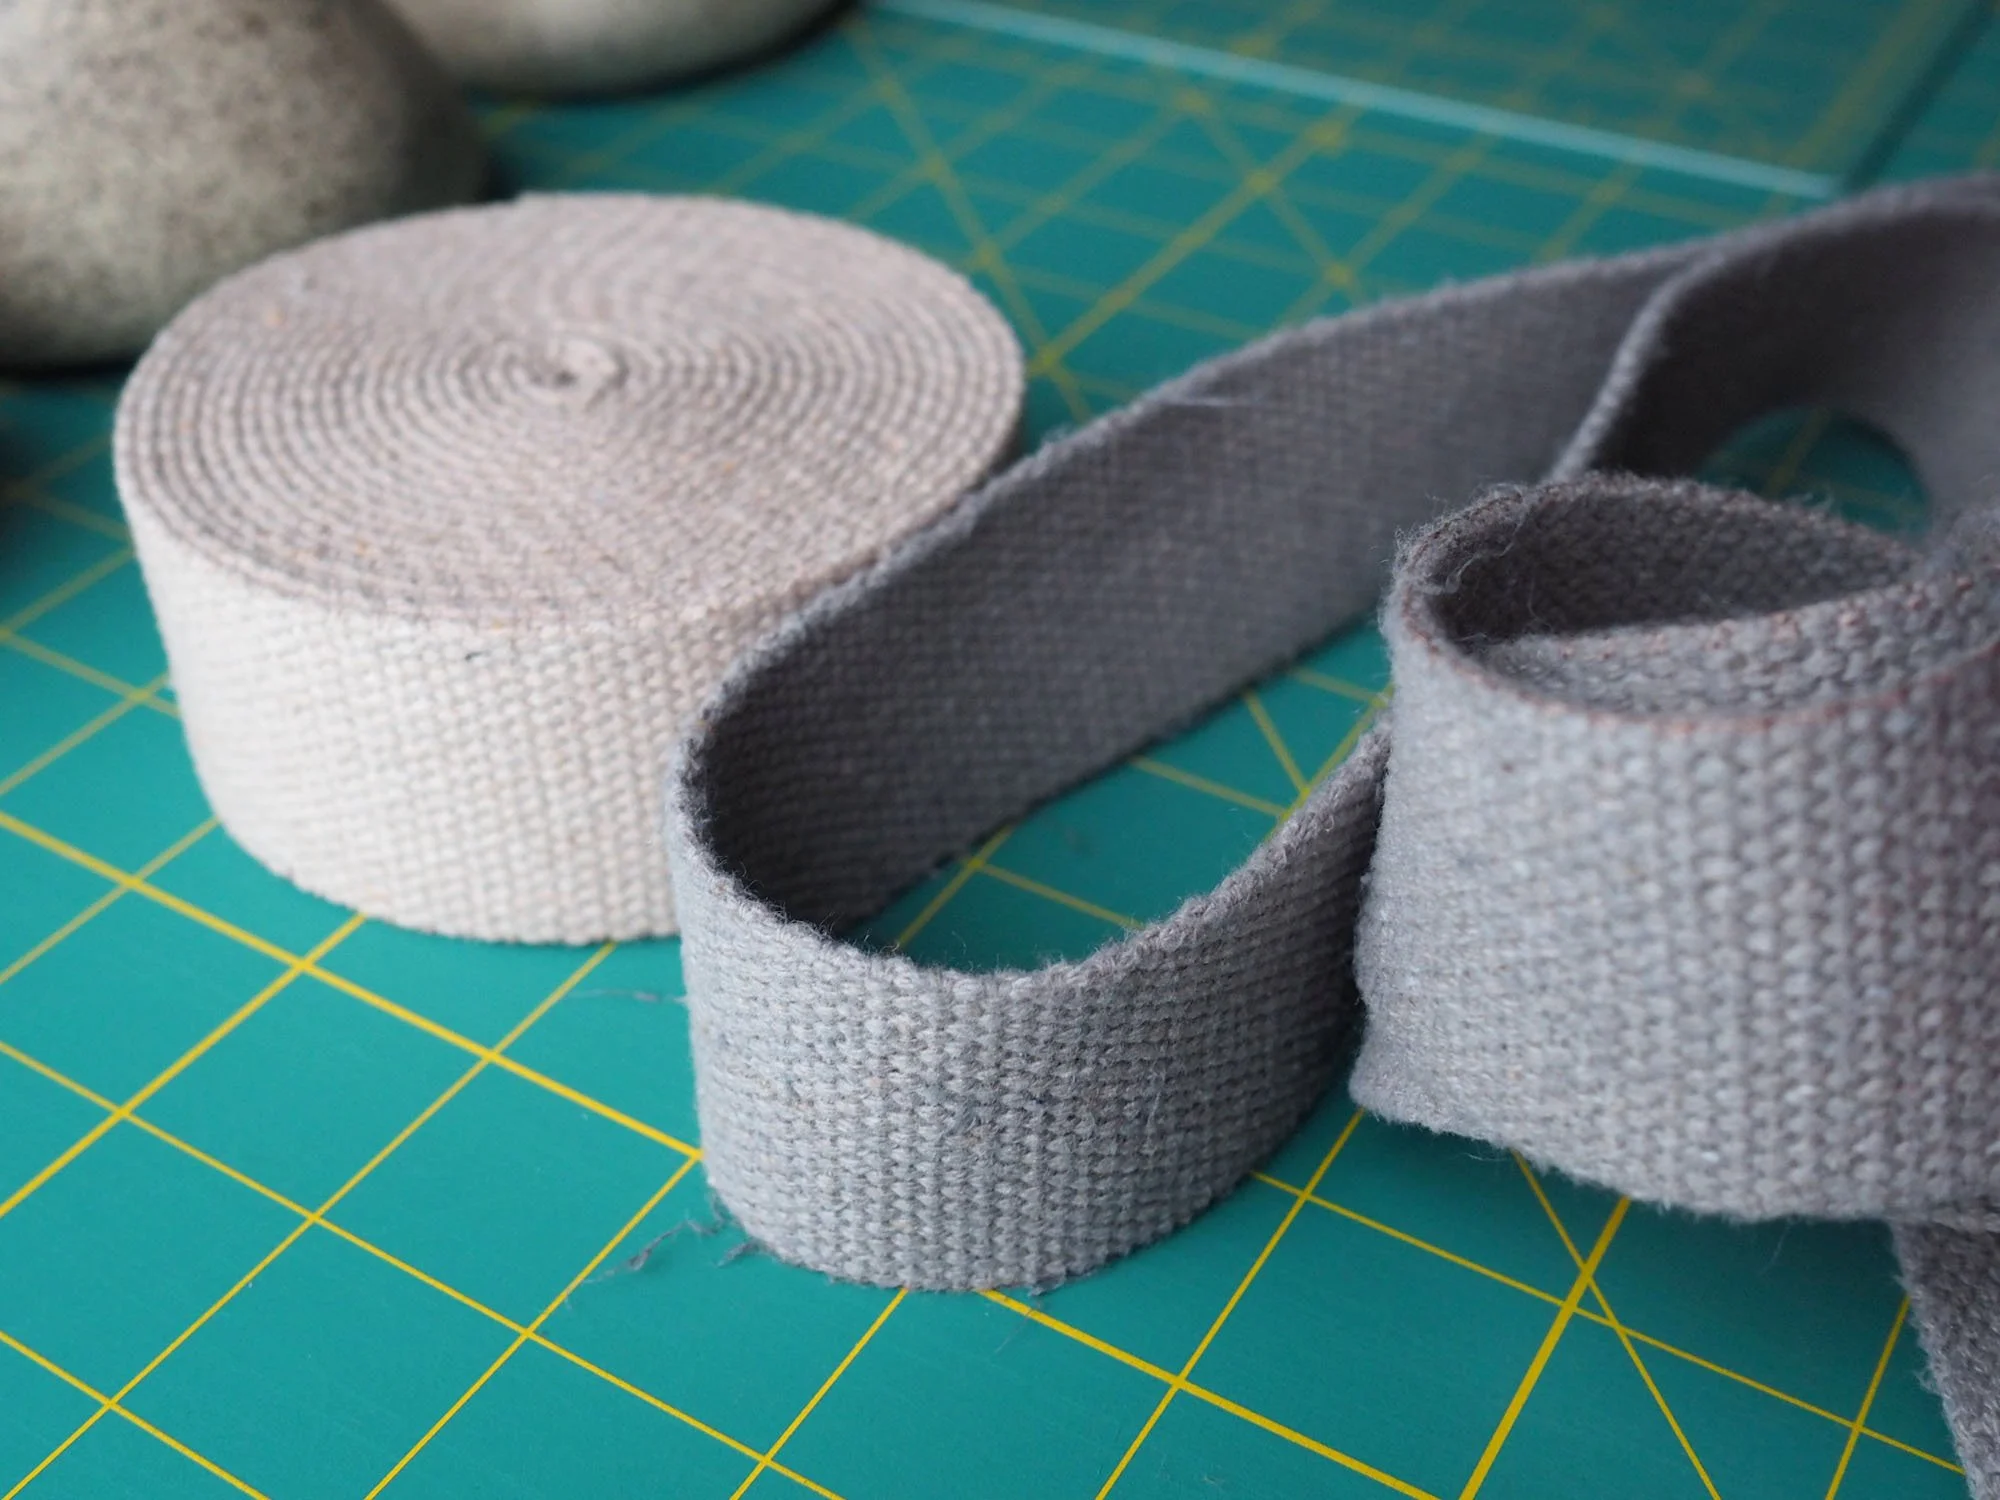
Fig 2: Cotton webbing dyed grey using Rit dye

I’ll probably interface the inner lining pieces for added stability, especially if I use a thinner cotton fabric for the lining.

The suggested method of rounding the corners of the front and back panels seemed to be a lot harder to sew (at least to me) than sewing straight seams around a rectangular panel. In the future I’ll forego the corner rounding, and instead sew straight seams and clip at each of the corners. I really like the approach in this tutorial where the top & bottom seams are sewn from center to 3/8” before the corner, then the SA is clipped at 3/8”, then the side seams are sewn from 3/8” below the top to 3/8” above the bottom. I also like the tutorial approach for attaching the bias binding (it seemed really similar to a quilt binding) and the suggestion to clip the binding at each of the corners when initially attaching it.

I changed my mind about the beige cotton webbing I originally bought, so I tried dyeing it grey using Rit charcoal grey dye in the washing machine. (Fig 2) Didn't get as dark as I was expecting but I'm still fine with the new shade (and still have plans to make an inkle loom band).

I sewed the end of the webbing around one of the end clips first, then threaded it through the slider, the second clip, and around the center slider bar where I sewed the other end of the webbing. I think it may have been easier to first attach the webbing to the slider center bar, but either way the outside edges of the slider require some maneuvering to sew around.

Care: Spot clean
Birchgrove x Bob Pants Hack

Pattern/Technique: Bob Pants by Style Arc in size 22 + Birchgrove Pants by Muna & Broad in size D.

Modifications: See below.

Materials: 2.25 yds (45” wide) black dot ikat from iTokri

New skills: Pattern hacking pants

Lessons & Techniques:

Toile 01 - Bob, no mods

Used the standard Bob pattern, no modifications. There were a few things going on here that I wanted to change:

  • These are designed as a mid-rise pant, but I generally like to wear high rise

  • There’s a lot of extra fabric bunched around the front of the pants - you can see where it’s folded over by about an inch

  • There are drag lines in the back of the pants and it feels like they’re climbing up into my butt

Toile 02 - Bob, scooped crotch & added rise in back

I pinned in at the center front (CF) by X” and redrew the front crotch scoop to be deeper, which smoothed out the front. This got me thinking about the geometry of pants as applied to bodies. Intuitively you’d think to grade a pattern for a larger body, one adds width to the pattern piece (i.e. more material). However, in practice, larger bodies aren’t necessarily wider, they’re actually deeper / more 3-dimensional (h/t to leila_sews for this insight). So to make the pattern fit my body better, it actually involved removing material from the front pieces to better accommodate my 3-dimensionality.

I also added 1.5” of additional rise at center back (CB) and graded it to 0” at the side seams. This got rid of the wedgie feeling at the back, but the back drag lines are still as aggressive as ever.

Toile 03 - Birchgrove crotch & Bob sides

Muna & Broad patterns work beautifully for my body geometry, so rather than trying to continue fitting the Bobs, I was curious if I could instead start with a tried & true pattern. I posed the question in the Muna & Broad forums, and Jess had some helpful advice to try drafting a balloon leg, then pivoting the inseam on the front pattern piece (she noted that the back pattern piece inseams are pretty similar).

For the first mashup toile I drafted the balloon leg on the outside of the Birchgrove pattern pieces. The balloon leg is very subtle, but there are way fewer drag lines so we’re on the right track! (Check that sweet #arthurfist in the upper left. :)

Back: I traced the crotch curve, inseam, and top lines from the Birchgrove. I aligned the top left corner of the Bob & Birchgrove, then traced the the outside edge of the Bob pattern piece with the outside edge of the Birchgrove to draw the Balloon leg.

Front: I traced the top, crotch curve, and inseam from the Birchgrove, then matched the outside edge with the Bob to trace the balloon leg. I also traced a pivot of the Birchgrove inseam where it hit the inseam of the Bob at the ankle. One thing I noticed after tracing is that the grain lines on the Bob & Birchgrove are not parallel using this overlay, which made me think that the lines on the toile might not be correct.

Toile 04 - Birchgrove crotch & Bob sides v1.5

On this toile I tried pivoting the inseam on the front leg. In the picture below, the right (relative to the viewer) leg is v1 and left leg is v1.5. The balloon leg is a bit more obvious, but there’s some extra material from the back piece making a slight bulge near the ankle.

I unpicked part of the seam and removed some material from the bottom part of the back leg (approx 1.25” at the ankle, graded to 0” at the knee) which got rid of the bulge. Balloon leg is still very subtle.

Toile 05 - Birchgrove crotch & Bob sides v2

We have liftoff! In this picture, v2 is on the left leg (relative to the viewer) and v1 is on the right leg. The balloon leg silhouette looks very similar to the original Bob but the fit feels much better (and no drag lines!)

On this version I wanted to try and redraw the front pattern piece by overlaying the Birchgrove crotch and Bob outseam where the grainlines are parallel. I traced the outside edge of the Bob, then aligned the Birchgrove crotch curve point with the same point on the Bob, making sure the grainline mark and top of the rise were roughly parallel (left image). Then I pivoted the inseam of the Birchgrove so it matched the angle of the inseam of the Bob and traced the Birchgrove inseam (right image).

Here’s the the difference in what the front pattern pieces looked like between v1 and v2—it’s pretty dramatic!

What I'd do differently: I didn't add pockets to the final wearable toile, and want to try it on a future iteration.

Care: Machine wash cold, dry flat.