Cocoknits Emma (Frogged)

A white woman takes a selfie in a mirror while wearing a partially finished grey and cream v-neck sweater

Pattern/Technique: Cocoknits Emma Sweater, View A

Modifications: Started waist shaping at 2 inches below the underarm CO (at fullest part of but with bra on).

  • Waist shaping: Repeated waist decrease round every 4th round (3 times total) to obtain 124 stitches

  • Hip increases: Repeated hip increase 3 times (4 times total) every 4th round

Materials: Knit Picks Simply Wool in Winkle & Wanda. Held 2 strands of this worsted yarn together to achieve marling. Purchased 5 skeins of each color for the project.

US11 knitting needle

New skills: Cocoknits sweater method

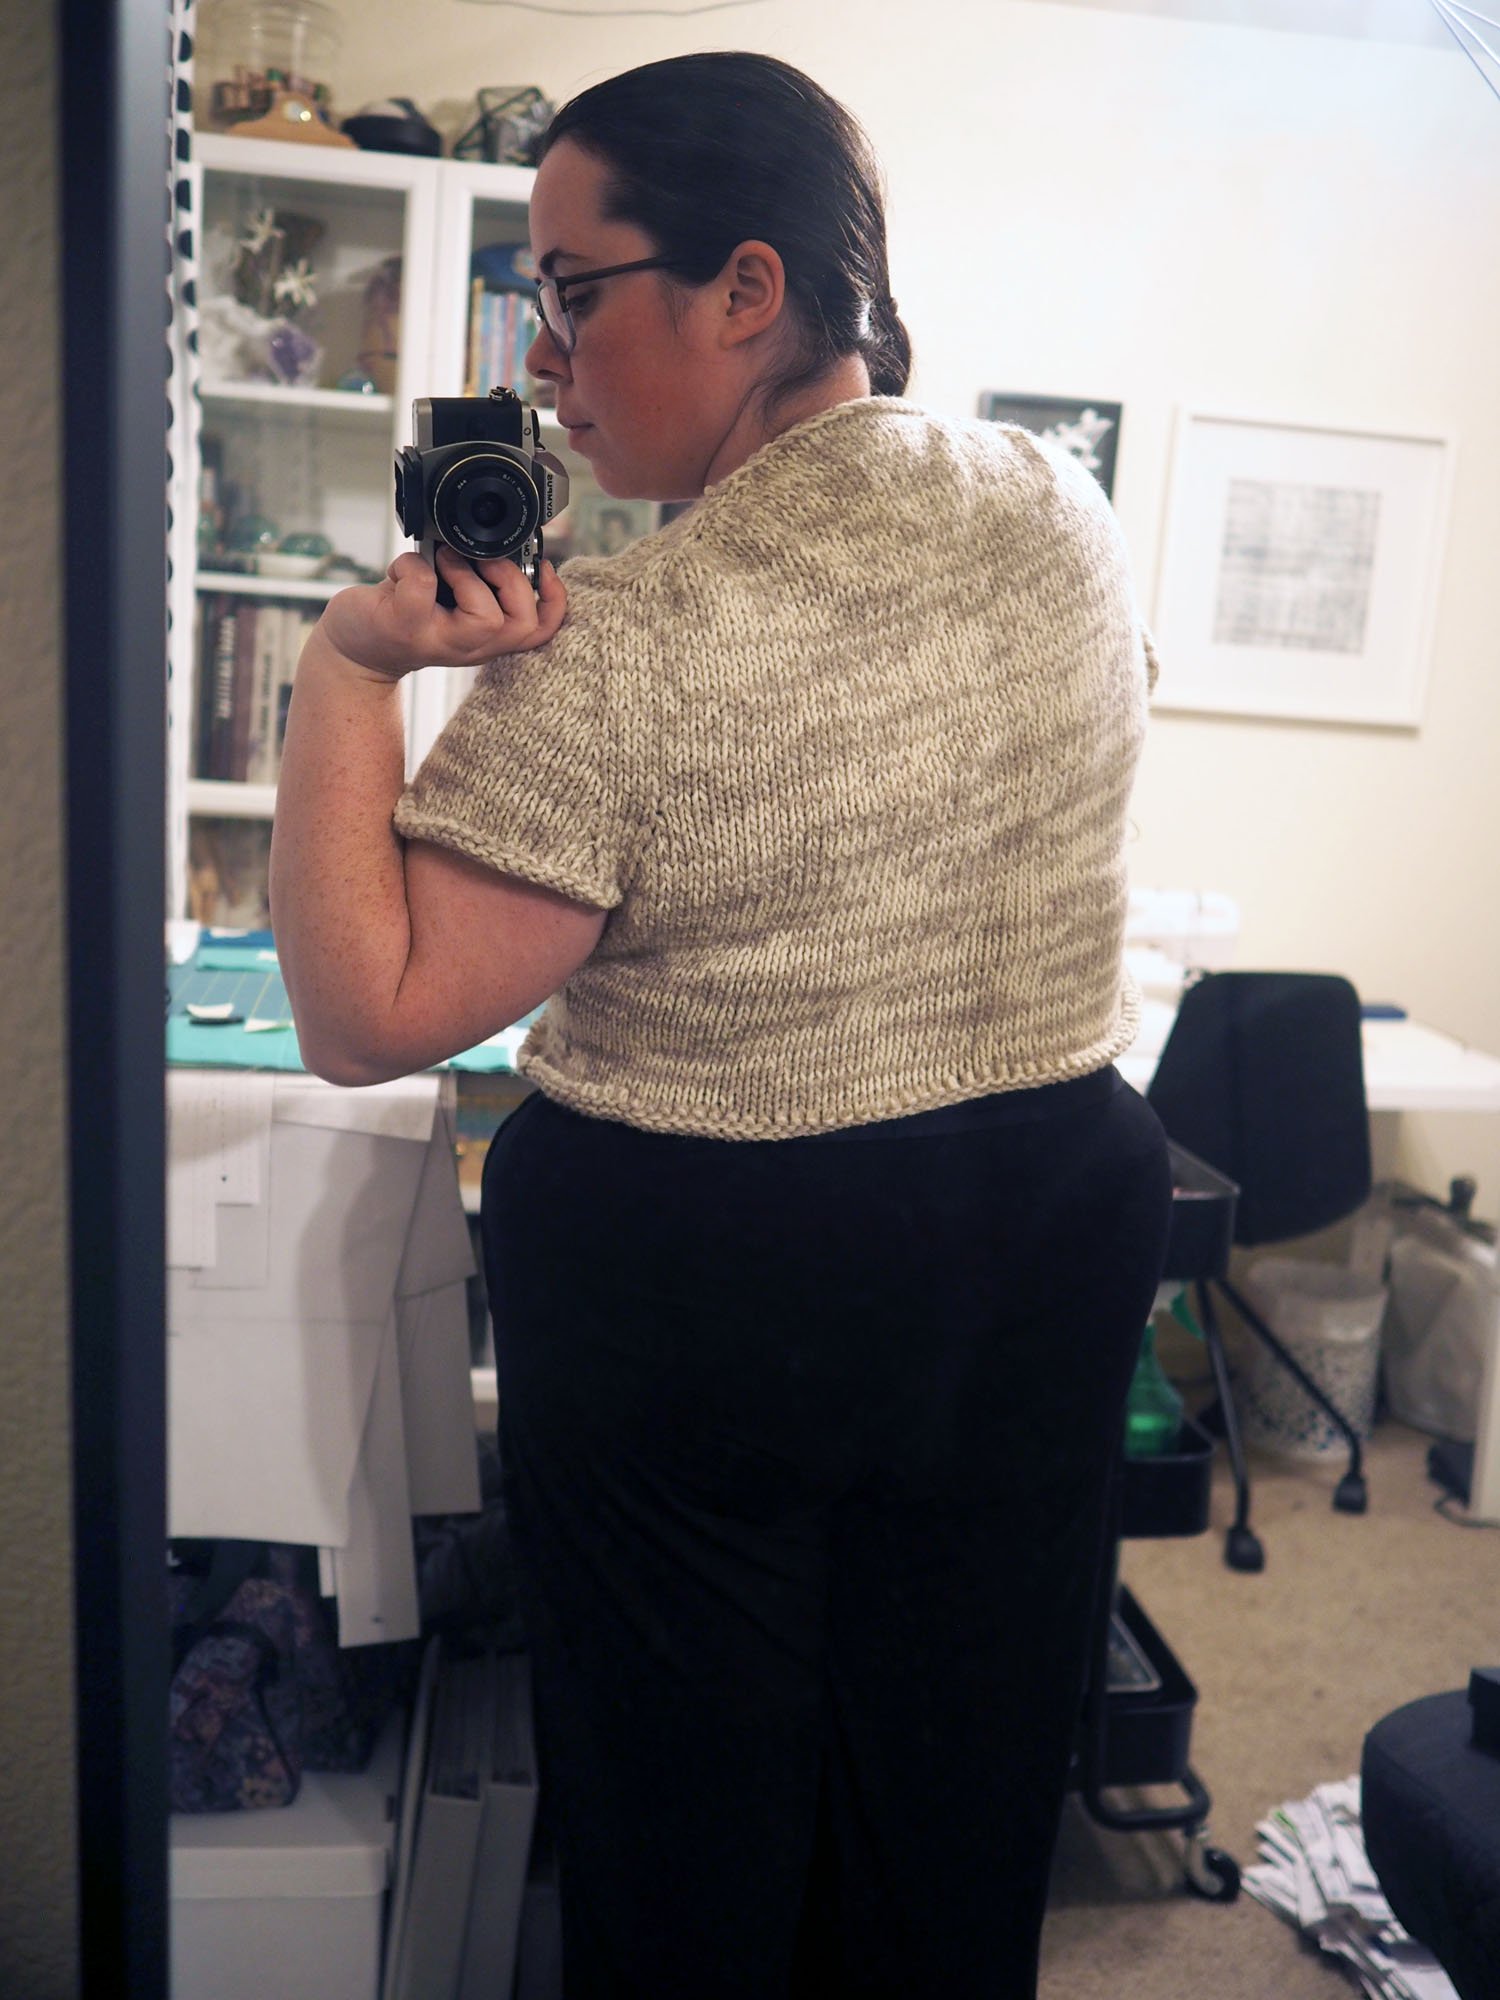
Lessons: The Cocoknits top-down method for sweaters is great—in particular I like that I can try on the sweater as I'm working on it and make fit adjustments on the fly.

Knit a swatch and check gauge for all sweater projects!! One thing I didn't realize is that row gauge is really important due to the way that the yoke is constructed and mine was slightly off so the fit isn't perfect in that area, but because yarn is stretchy it's pretty forgiving. However, I did a ton of reading about how to adjust row gauge (tl;dr it might be useful to eventually learn Portuguese purling) and in the future I'll be a lot more careful about swatching/checking gauge.

Fit notes: Overall I quite like the silhouette of this sweater and the way it conforms to my body shape without being too boxy (especially since it uses a chunky weight yarn). However, I'm not into the super-low neckline, which is even more pronounced because the seams roll under and the bottom stitches stretch out. I make this again I'd make View B instead.

What I'd do differently: Ultimately I decided to frog this project because even though I like the fit, I don't see myself wearing this regularly due to the overly low neckline and color. I started this project prior to exploring and building awareness of the colors I want to wear, and the creamy marled tones of this sweater don't feel like they fit in my wardrobe, which tends toward higher contrast pieces.

I think my plan will be to use this yarn to make a throw / baby blanket (maybe this: https://www.purlsoho.com/create/2020/03/11/colorblock-jute-stitch-blanket/ as I have enough yardage for the crib size) and try knitting Emma View B using the chunky Knit Picks Heathered Grey yarn I'd previously used for the Purl Soho Big Brioche Turtleneck (also frogged midway). The gauge on both patterns matches, so it should be an easy swap.

Care: n/a

A white woman takes a selfie of her back in a mirror while wearing a partially finished grey and cream v-neck sweater
A white woman takes a selfie of her side in a mirror while wearing a partially finished grey and cream v-neck sweater

Miffy Hat

A knit hat based on the design of Miffy the Bunny

I grabbed lunch with an old friend recently, who passed this kit on from his wife (she'd received it as a baby gift but didn't knit and understandably didn't have time to learn while also caring for a newborn and a toddler). It was super thoughtful and given with no expectation that I'd made it for them, so naturally I'm going to send it their way for their new kiddo.

Pattern/Technique: Miffy Hat kit by Stitch & Story

Modifications: none

Materials: 1.5 skeins Stitch & Story The Lil Merino, shade no. 514 (cream). Face sewn with black yarn included in the kit (I suspect it's also merino due to the softness, but a more traditional woolen spun vs. plied threads)

US8 needles

New skills: seaming practice

Lessons: The yarn in the kit was beautifully soft, but made of tiny threads that aren't felted, so it was very splitty and lost its twist easily. I had to take quite a lot of care to make sure I wasn't splitting threads across rows while knitting. If I were a true beginner knitter, I'd probably have a lot of trouble working with this yarn.

Black is a high contrast yarn, so I opted to not weave in the ends of the sewn mouth/eye details. Instead I left tails on the back of the piece, triple knotted them, and then trimmed the ends.

Getting even seams is really hard (!) but luckily if you're off a row, it's pretty easy to fudge, especially on vertical seams.

It was really interesting to see what decisions were made to create a beginner/kit friendly pattern (e.g. knitting flat, then seaming vs. knitting in the round). This is a matter of personal taste, but I'd find it much easier to knit in the round and do less seaming (though this would require circular needles). I also found the tools in the kit (bamboo straight knitting needles, a plastic tapestry needle with a massive eye) were trickier to use, so I opted for my laminated wood circulars, and a smaller tapestry needle for weaving in ends. The end product was definitely lovely, but if I were a true beginner I would have found this to be a challenging kit to make.

What I'd do differently: If I made this again, I would knit the hat body in the round on a 16" circular, or using the magic loop method. The ears I'd either knit in the round on DPNs, or knit flat and seam (depending on what seems like more of a PITA at the time).

Care: Hand wash, lay flat to dry