Crocheted Raffia Basket

A small crocheted basket is sitting on a workbench

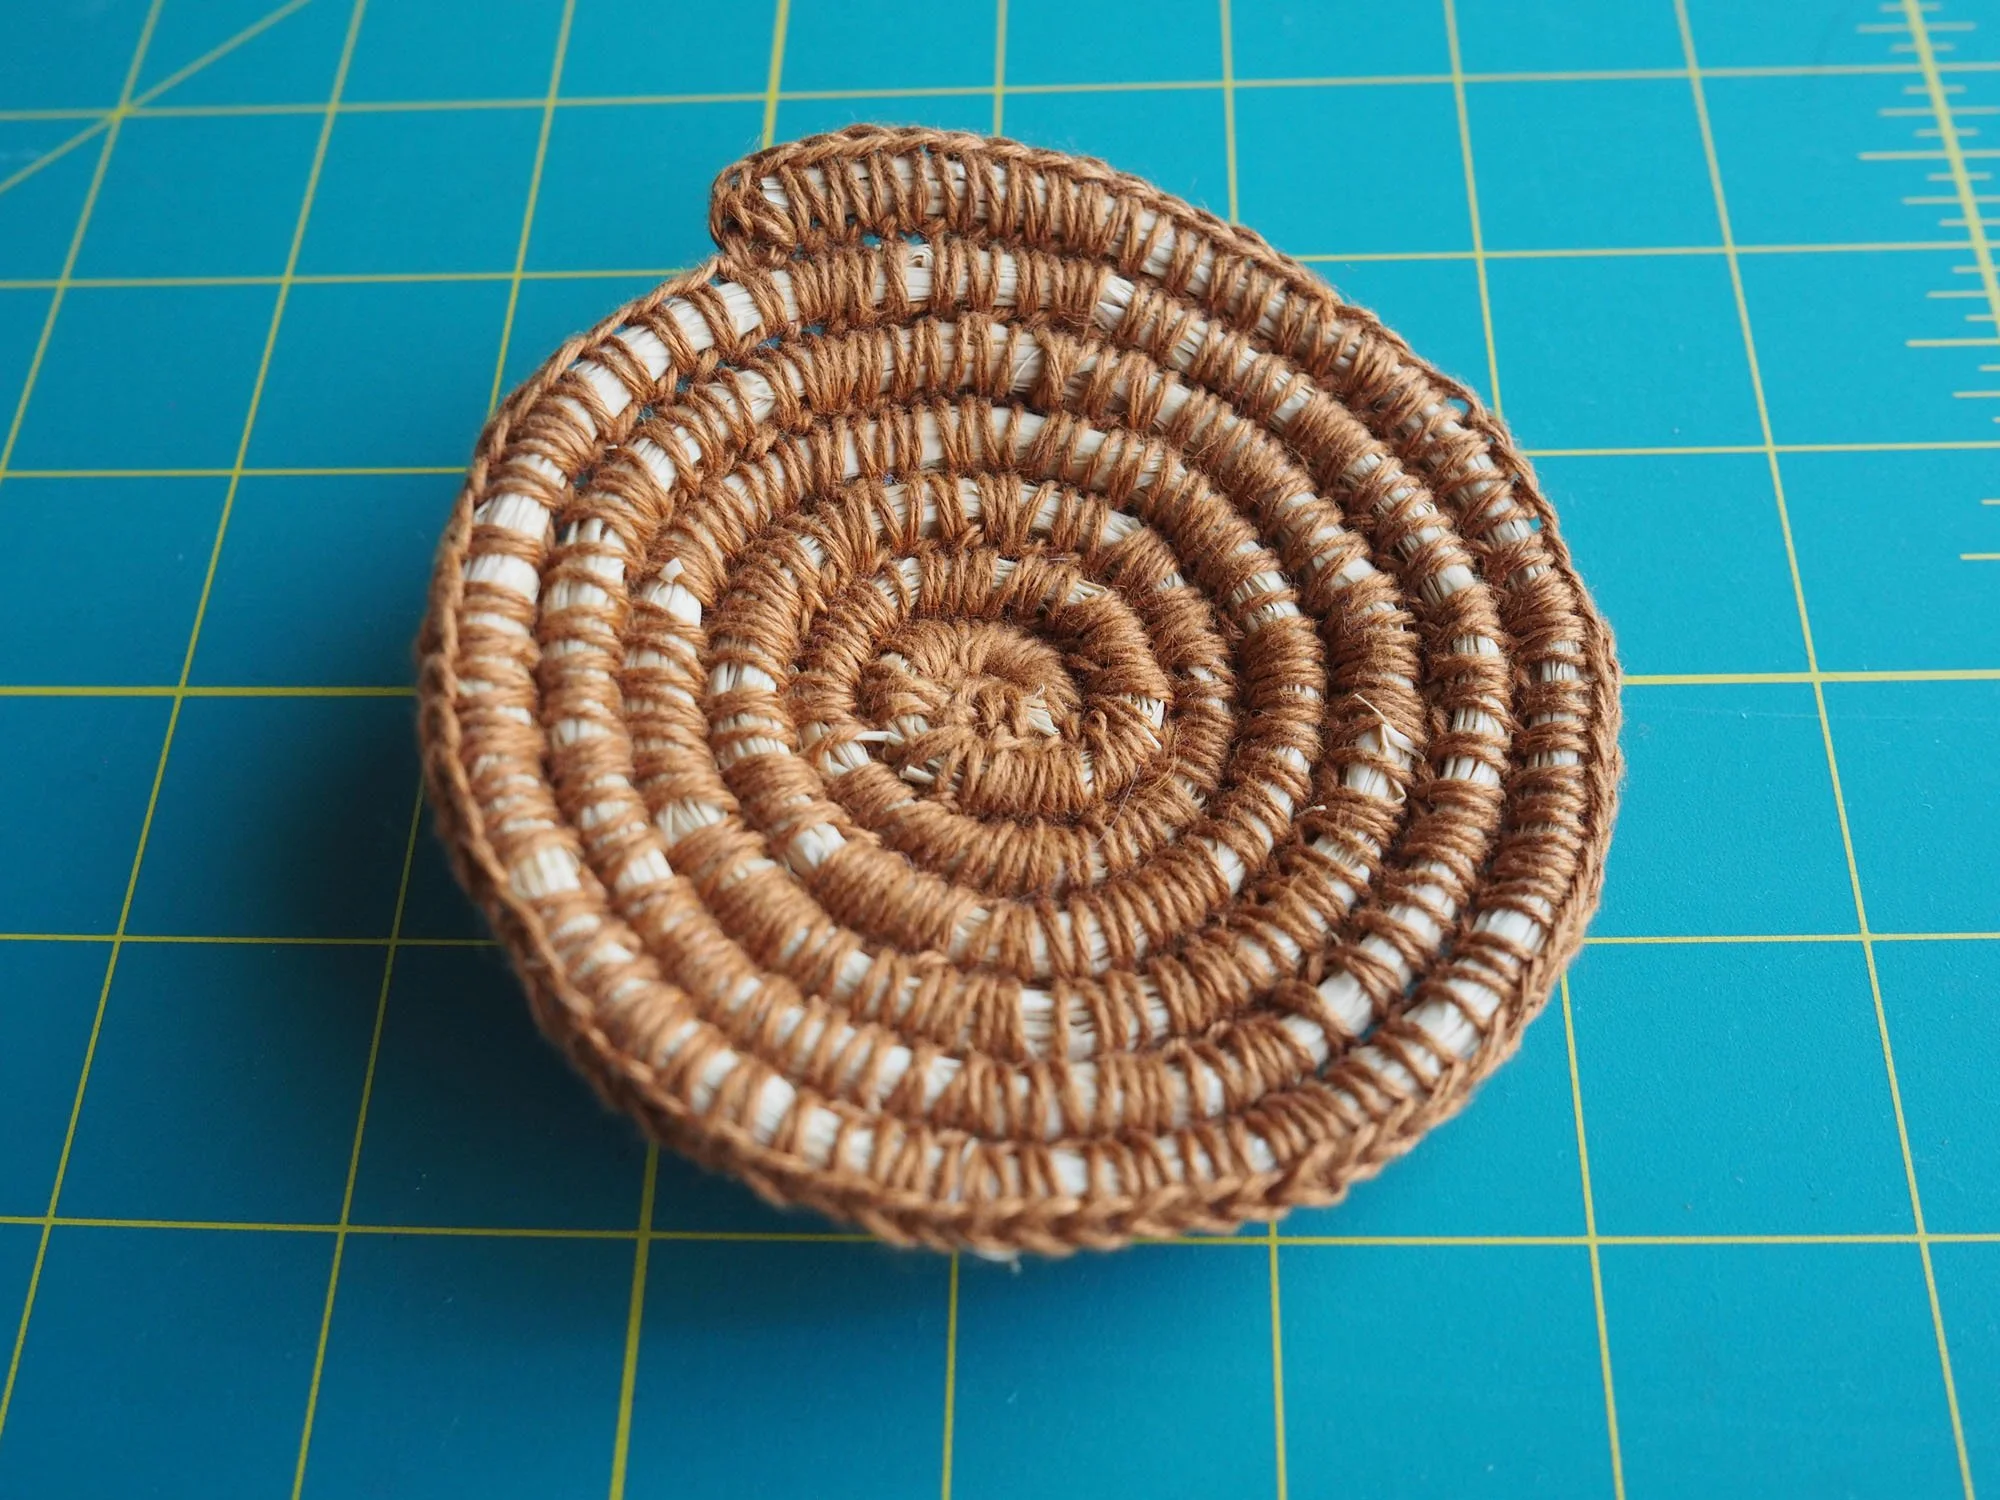
Pattern/Technique: Crocheted Raffia Basket by Anne Weil (part of a kit from The Crafters Box)

New skills: crocheting around another material

Lessons: The optimal thickness of the raffia bundle seems to be roughly the same diameter (maybe even a bit larger) than the crochet hook.

It's quite challenging to keep even tension on the working yarn while also holding a core material--particularly one that needs to be bundled tightly like raffia. Manipulating the material, while trying to insert the crochet hook into the linen loops and avoid snagging raffia hurt my hands, so I ended up cutting this project short and doing 1/3 of the recommended number of coils.

I noticed that the coil of the basket can be manipulated to be flat or very steep/conical. It's unclear whether this is endemic to this style of basket, or due to some issue with my tension.

What I'd do differently: The technique is quite interesting but trying to keep an even core of raffia was a challenge, and manipulating the crochet hook was physically painful over time. If I attempt a crocheted basket again, it with a more uniform core material like cotton rope, and one of my soft grip crochet hooks vs. the wooden hook included in the kit.

Miffy Hat

A knit hat based on the design of Miffy the Bunny

I grabbed lunch with an old friend recently, who passed this kit on from his wife (she'd received it as a baby gift but didn't knit and understandably didn't have time to learn while also caring for a newborn and a toddler). It was super thoughtful and given with no expectation that I'd made it for them, so naturally I'm going to send it their way for their new kiddo.

Pattern/Technique: Miffy Hat kit by Stitch & Story

Modifications: none

Materials: 1.5 skeins Stitch & Story The Lil Merino, shade no. 514 (cream). Face sewn with black yarn included in the kit (I suspect it's also merino due to the softness, but a more traditional woolen spun vs. plied threads)

US8 needles

New skills: seaming practice

Lessons: The yarn in the kit was beautifully soft, but made of tiny threads that aren't felted, so it was very splitty and lost its twist easily. I had to take quite a lot of care to make sure I wasn't splitting threads across rows while knitting. If I were a true beginner knitter, I'd probably have a lot of trouble working with this yarn.

Black is a high contrast yarn, so I opted to not weave in the ends of the sewn mouth/eye details. Instead I left tails on the back of the piece, triple knotted them, and then trimmed the ends.

Getting even seams is really hard (!) but luckily if you're off a row, it's pretty easy to fudge, especially on vertical seams.

It was really interesting to see what decisions were made to create a beginner/kit friendly pattern (e.g. knitting flat, then seaming vs. knitting in the round). This is a matter of personal taste, but I'd find it much easier to knit in the round and do less seaming (though this would require circular needles). I also found the tools in the kit (bamboo straight knitting needles, a plastic tapestry needle with a massive eye) were trickier to use, so I opted for my laminated wood circulars, and a smaller tapestry needle for weaving in ends. The end product was definitely lovely, but if I were a true beginner I would have found this to be a challenging kit to make.

What I'd do differently: If I made this again, I would knit the hat body in the round on a 16" circular, or using the magic loop method. The ears I'd either knit in the round on DPNs, or knit flat and seam (depending on what seems like more of a PITA at the time).

Care: Hand wash, lay flat to dry